---
title: "Splide JS Guide: Create Advanced Sliders with Ease in Webflow"
description: "Splide JS and Webflow: the perfect duo for exceptional sliders. Follow our comprehensive guide for easy setup and advanced tips. Improve your site now!"
canonical: "https://www.digidop.com/blog/guide-sliders-splide-js"
source: "https://www.digidop.com/blog/guide-sliders-splide-js"
---
## Navigation
- [Home](https://www.digidop.com/)
- [Blog](https://www.digidop.com/blog)
- [Development](https://www.digidop.com/blog-thematics/development)
# Splide JS Guide: Create Advanced Sliders Easily in Webflow
Tutorial
7 min
Published on Oct 12, 2023

**Introduction**
When it comes to creating sliders in Webflow, most users quickly encounter a frustrating reality: the native options for sliders are quite limited. Building advanced sliders in Webflow can be a bit of a challenge, especially if the data needs to be sourced from the CMS.
[There are some alternatives](https://www.digidop.com/blog/tutorial-create-cms-slider-webflow), such as creating sliders using [Finsweet attributes](https://www.digidop.com/tools/attributes), but they are not (for now) always smooth or advanced enough to meet the specific needs of your project.
This is where Splide JS comes into play. This JavaScript library allows you to **create much more advanced and customizable sliders** with a little **custom code.**
In this article, we will introduce you to Splide JS and show you how to integrate it into your Webflow projects to create more personalized sliders, even incorporating CMS collections if necessary. Get ready to discover how to enhance your Webflow sliders with Splide JS. Let's go!
## What is Splide JS?
*“So, what exactly is Splide JS?”*
[Splide JS](https://splidejs.com/guides/getting-started/) is a **lightweight and flexible JavaScript library** designed specifically for creating sliders. It was developed with **simplicity and performance** in mind, making it an excellent choice for developers looking for versatile, more advanced, and customizable solutions.
But why should you consider using it in your Webflow projects? Let's go over the key points:
- **Ease of use:** Even though it requires custom code, Splide JS is designed to be intuitive, even if you're not a JavaScript development expert. Its simple and well-documented API makes it easy to set up functional sliders quickly.
- **Flexible customization:** Splide JS is highly customizable. You can adjust nearly every aspect of your slider, from the number of items displayed to the transition speed, including transition effects and auto-scrolling.
- **Optimized performance:** Splide JS is performance-minded. It is lightweight and ensures a smooth experience for users, even on mobile devices.
- **Accessibility:** The library supports web accessibility, meaning your sliders will remain usable for all visitors, including those using screen readers.
- **Compatibility with Webflow:** Splide JS can be easily integrated into your Webflow projects with a bit of custom code, making it an ideal option for enhancing your existing sliders or creating new ones with greater flexibility.
In the following sections of this article, we will explore in detail how to leverage Splide JS to create advanced sliders in Webflow. You will discover how to install, configure, and customize it to meet your specific needs.
## 1. Setting Up Splide JS
But before diving into advanced customization of Splide JS, let's see how to easily integrate it into Webflow. Follow these steps to get started quickly:
### Step 1: Integrating Splide JS
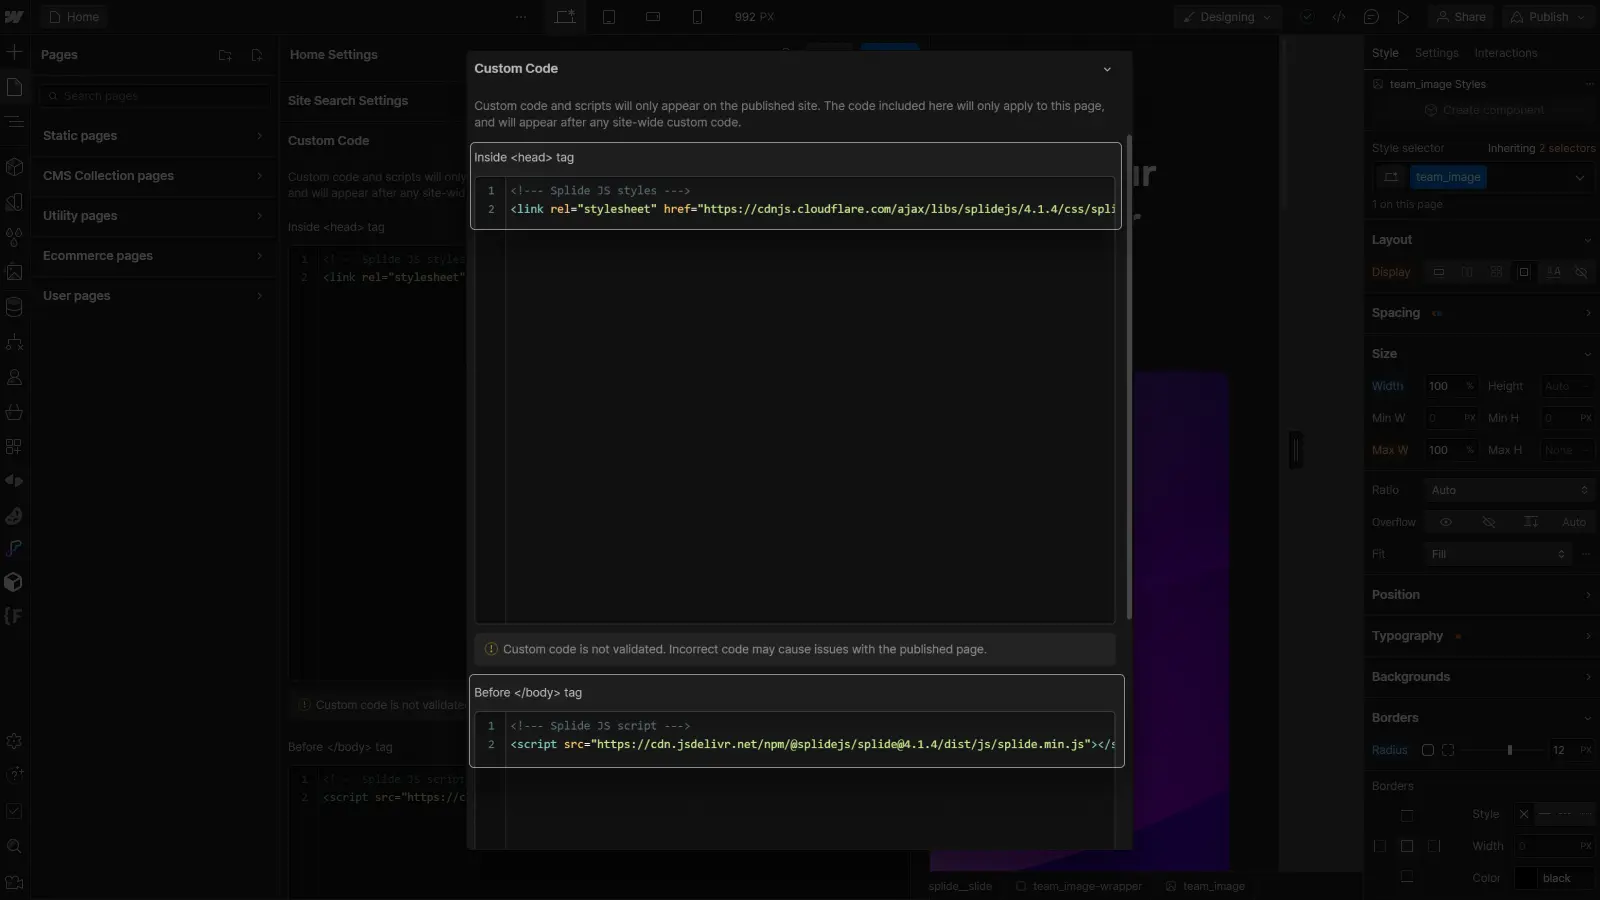
The first step is to integrate the Splide JS library into your Webflow project. To do this, copy and paste the following snippets into the custom code of your page (or site).
- **Paste the following code into the head:**
```
```
- **Paste the following code into the footer:**
```
```
### Step 2: Required HTML Structure
For Splide JS to work, you will need to create **a specific HTML structure** for your slider in your Webflow project:
```
Contenu de la slide 1
Contenu de la slide 2
Contenu de la slide 3
```
One of the major advantages of Splide JS over native Webflow sliders is that **you can easily create sliders from CMS collections**. To do this, add a collection inside a Div Block with the class “splide” and apply the rest of the structure to the elements of the CMS collection:
- **Collection List Wrapper = splide\_\_track**
- **Collection List = splide\_\_list**
- **Collection Item = splide\_\_slide**
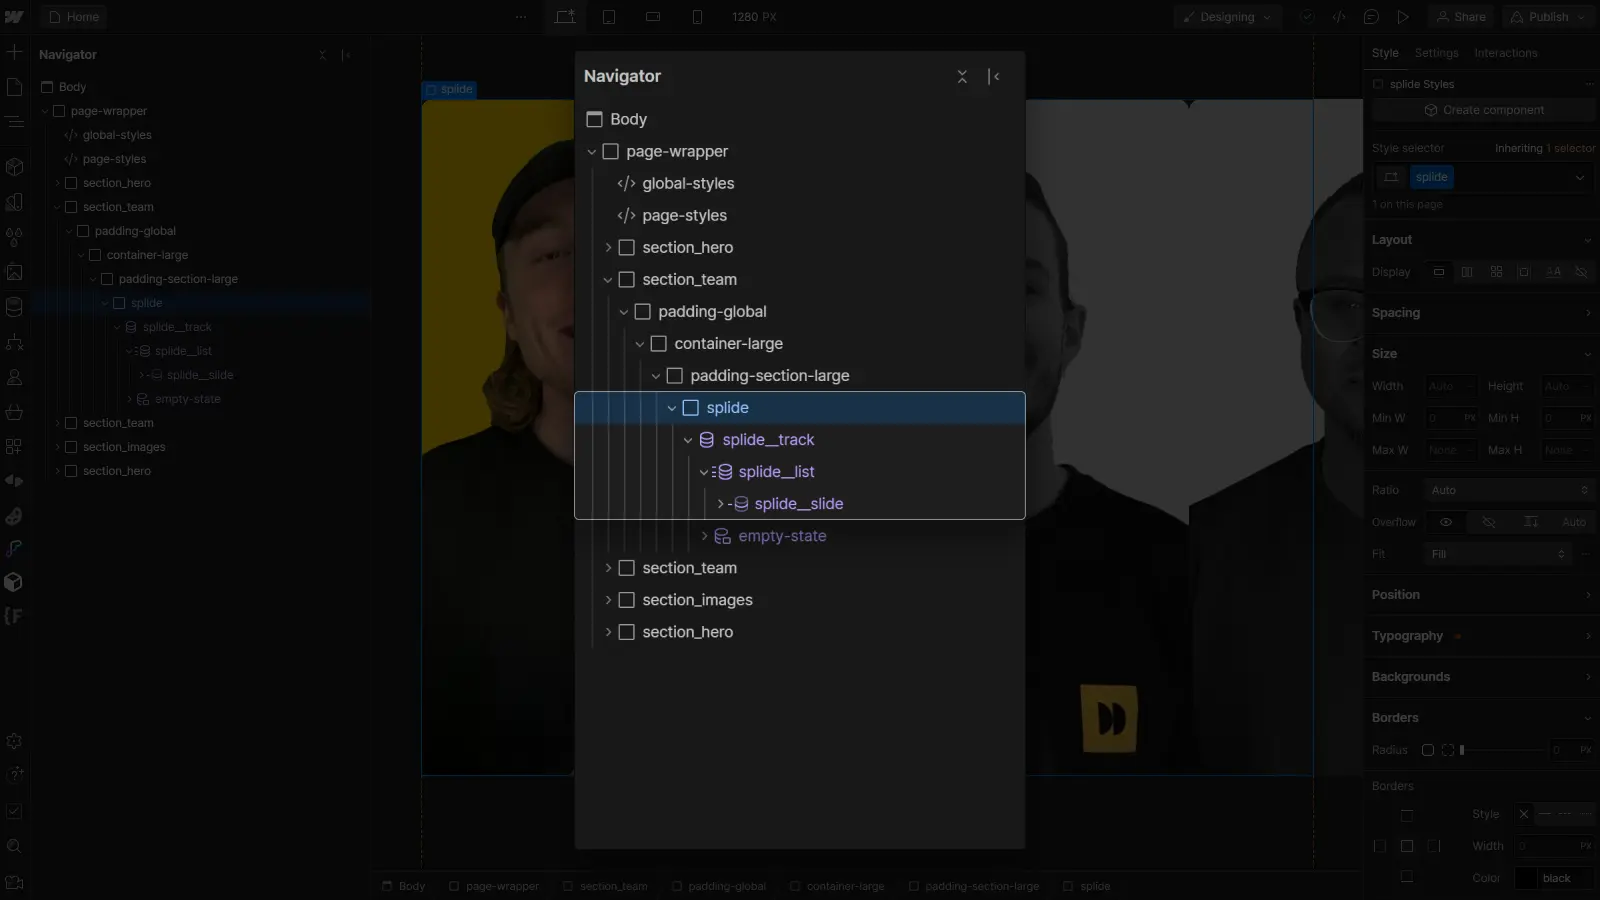
**Note:** the name of each class contains two underscores “\_\_” in a row.
### Step 3: Customizing Styles
Once the structure is in place, **customize the styles of your slider.**
If you want to manage multiple sliders with Splide JS in your project, **add a combo class to the Splide elements for each slider** before styling them. This way, the styles applied will be specific to the corresponding slider (and not common to all sliders managed by Splide).
For example, add a combo class “is-team” to all Splide elements in the Team slider:
```