Figma continues to stand out as an ever-evolving design tool. During the Figma Config 2023 event, an entirely new feature was unveiled: Variables in Figma. Among many other features, Variables have emerged as a powerful tool offering designers a new approach to design and prototyping. In this article, we revisit the key aspects of Variables in Figma and explain how they are revolutionizing our approach to creating mockups.
What are Variables in Figma?
Figma interface focusing on the variables feature
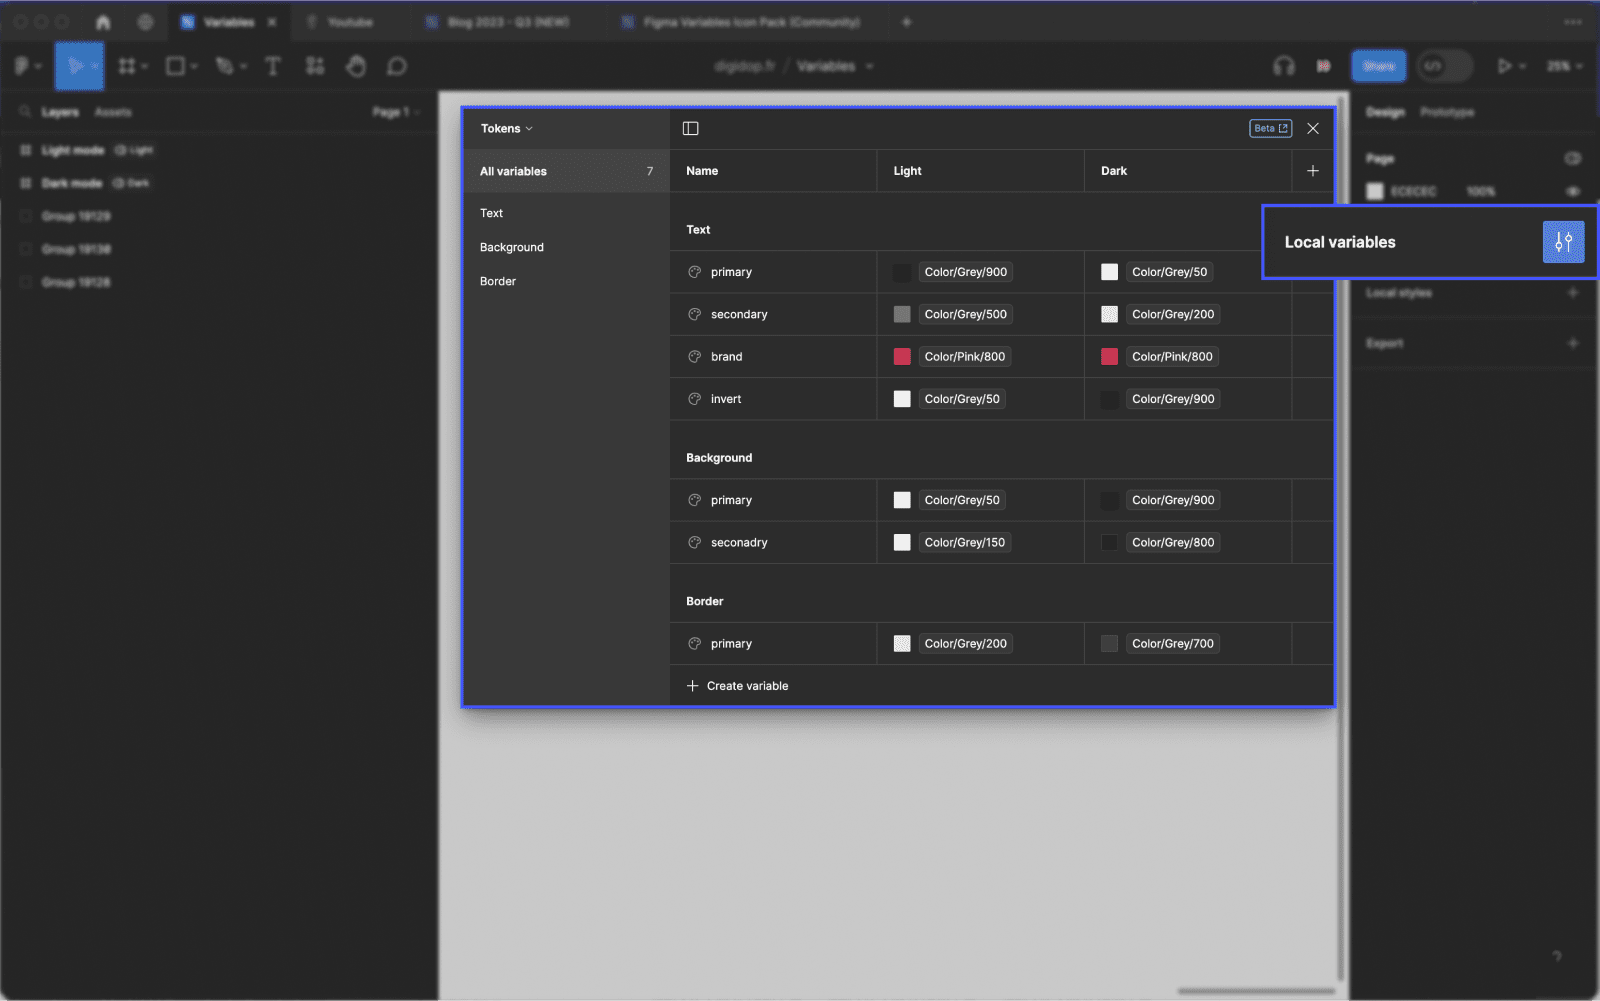
The variables represent a new approach to defining project properties in Figma. They enable designers to store reusable values, applied to all sorts of design properties and/or prototyping actions. You will save time and effort when creating your mockups, managing design systems, and creating prototyping flows in Figma.
At first glance, variables might be compared to Styles in Figma, but they go far beyond. Unlike Styles, which allow you to set uniform styles for design elements, variables let you create collections of interconnected data, establishing relationships and defining more complex multi-level properties.
Variables are organized in a completely new interface in Figma, resembling a table, allowing you to create and assign values to your variables in a structured manner. This approach is akin to a real database or a CMS integrated into Figma, making it easier to organize and manage the various properties of your project.
Advantages of Variables in Design
The Variables offer numerous advantages, including:
- Flexibility and Consistency: Variables allow for standardizing elements in your design and simplify subsequent updates by simply changing a variable's value. For instance, by defining variables for the entire color palette of your project, such as Grey-900, Grey-800, Grey-700, etc., you can quickly change a color and see the adjustments reflected across all related mockup elements.
- Collection Management: Variables can be organized into Collections, simplifying the management of different project properties like colors, spacing, fonts, etc. Beyond creating simple styles, collections allow you to assign additional properties to each variable by linking them together. For example, you can use "Semantic naming" for color variables to define their use cases, such as assigning a color for each type of text (primary, secondary, etc.).
- Modes for Variants: The Modes feature allows you to create variants for your variables, such as Dark Mode and Light Mode, enabling you to test different appearances with just one click. This gives you the flexibility to explore various designs and contexts without needing to recreate separate elements.
- Improved Productivity: By using Variables, you can make changes more rapidly and avoid the need to manually edit each element in your design. Variables provide a more efficient approach to managing and updating your design, allowing you to save time and focus more on creativity and innovation.
With Variables in Figma, you have a powerful tool that optimizes your design workflow, enabling you to create consistent, flexible, and efficient designs.
How to Use Variables?
Variables introduce a new and exciting way to design web mockups. Although this feature may seem complex at first, we encourage you to tune in to our upcoming YouTube video scheduled for 30/07 (👉 Subscribe so you don’t miss out)to understand how to create, edit, and organize variables in Figma.
Here are the main steps for creation:
1.1 Creating Variables
4 types of Figma variables: color, number, string, boolean with associated icons

To get started, you can create a variable by clicking on "Create Variable" in the design properties panel. You will then have a choice of different options to create the variable that best suits your needs:
- Color: This option allows you to define colors for your elements. You can create solid fills for background colors, text colors, and stroke colors.
- Number: This option allows you to define numeric values for your elements. You can use number variables for Frames, corner radius, minimum and maximum widths/heights, auto-layout, as well as managing margins and spacing between elements (padding and gap).
- String: This option lets you define text blocks and word variants. For example, you can use string type variables to create a layout variant in another language.
- Boolean: This option allows you to set boolean values (true/false) for your elements. Boolean variables are useful for managing conditional visibility of elements, as well as for instances of variants that have true/false values.
1.2 Creating Groups and Collections
Once you have created your variables, you can organize them into Groups and Collections for better management. For instance, you can create one group for colors, another for fonts, etc.
By creating Groups, you can gather similar variables, making navigation and editing easier and more intuitive.
On the other hand, Collections allow you to consolidate elements with the same function, enabling you to create matches between your Figma variants.
1.3 Using Modes
Figma variable table with dark and light mode layout
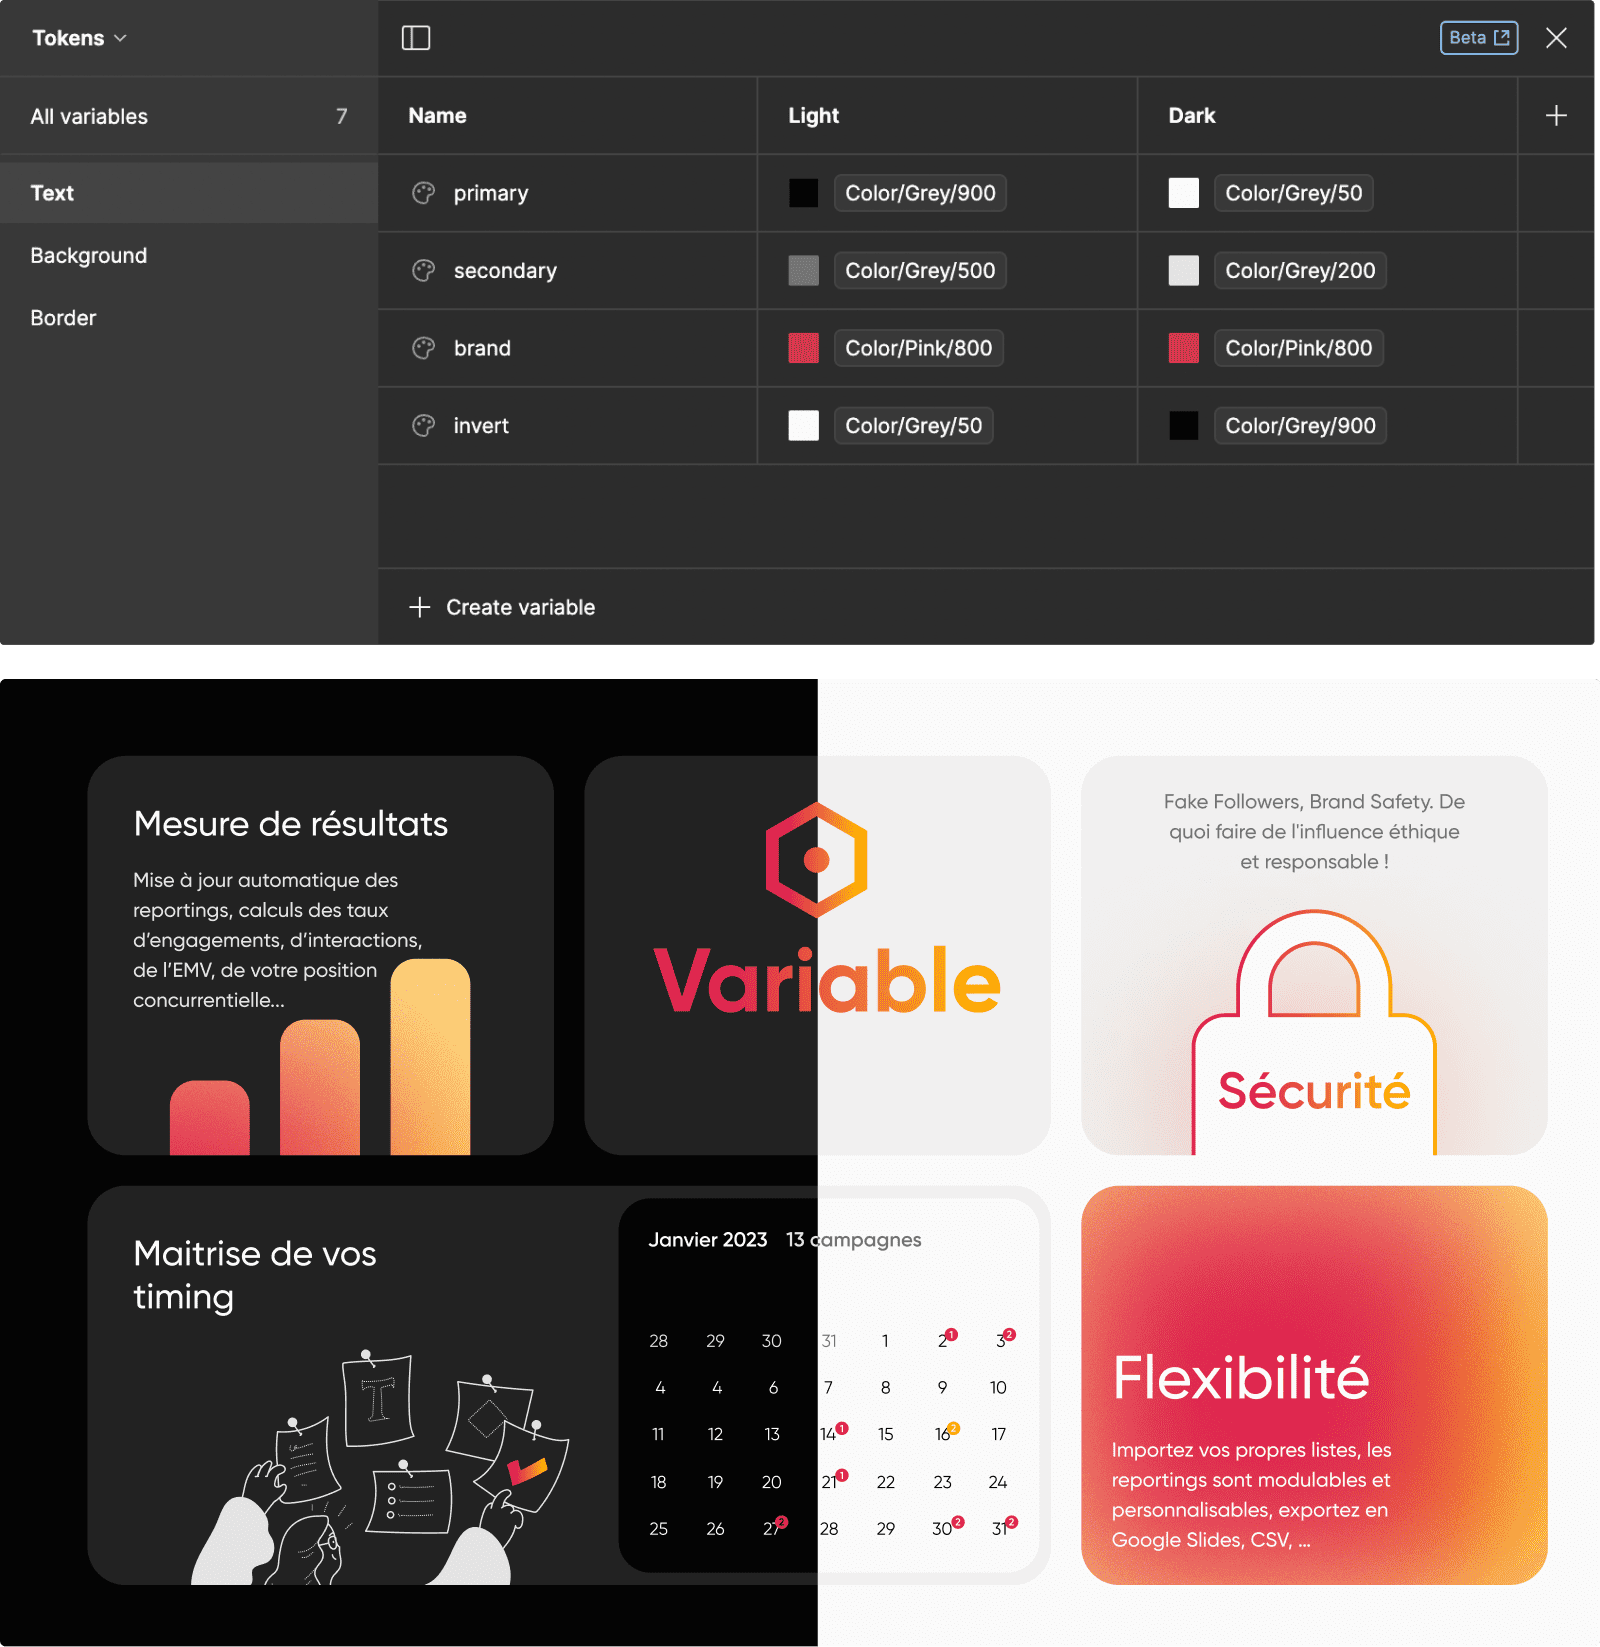
The Modes feature allows you to create Figma variants for your variables. You can easily switch between different versions of your mockup, like Dark Mode and Light Mode, to test different appearances with just one click.
Modes give you greater flexibility to explore different themes and design contexts without needing to recreate separate elements. They are a powerful tool to help you quickly and efficiently visualize your designs in different states and scenarios. With Modes, you can make informed decisions about the final look of your project while streamlining your design process.
2. Variables for Design and Design Systems
The use of Figma variables goes beyond simple styles. Variables will help you standardize your mockups by defining specific values for each element of your project. For instance, this applies to the spacings in your mockups. By creating variables for your horizontal padding, vertical padding, and gap, you will ensure that fixed values are used throughout your project. Consequently, your design will be more coherent, and you can evolve it in just a few clicks from your variables.
They also play a key role in establishing a design system by allowing the implementation of design tokens. This approach, known as Tokenization, involves coding the various variables of a project to precisely define when to use them. By integrating variables into your design system, you facilitate the management of project properties and contribute to its scalability. With this methodology, you can create consistent and scalable designs while saving time and effort.
3. Advanced Prototyping with Variables
Using Figma Variables to Create an E-Commerce Prototype | Complete Tutorial
Variables offer new perspectives for advanced prototyping with fewer Frames. You can leverage Expressions and Conditional visibility to create advanced interactions in your prototypes. By combining variables with other advanced features of Figma, you can develop highly interactive and realistic prototypes while maintaining a simplified approach to managing the various states of your design. The possibilities are vast, allowing you to explore dynamic and complex interactions while remaining efficient in your prototyping process.
4. Variables in Figma APIs
The power of Figma variables also extends to the developer ecosystem through integration with Figma's API. This feature allows you to build custom plugins and widgets that leverage variables. Whether you want to import or export variables, convert styles into variables, or simply interact with design properties, Figma's API provides numerous opportunities to integrate variables into your development workflow.
Variables in Figma represent a major advancement in the efficiency of the design process and prototyping capabilities. Whether you're managing design systems, creating interactive prototypes, or building custom plugins, variables enable designers to achieve more with less effort. We strongly encourage you to take advantage of this feature in Figma and integrate it into your future design processes to enhance their evolution.