.jpeg)
Disclaimer : For this example, we will create a button with a border gradient, but this trick can just as easily apply to a div block.
Although it's possible to create gradients natively in Webflow, they are not applicable to the CSS property "border." Thus, it is "natively impossible" to create a border gradient in Webflow.
Unless... you use the following tips
Create a border gradient on a button in 3 steps
1 - Create the button in Webflow
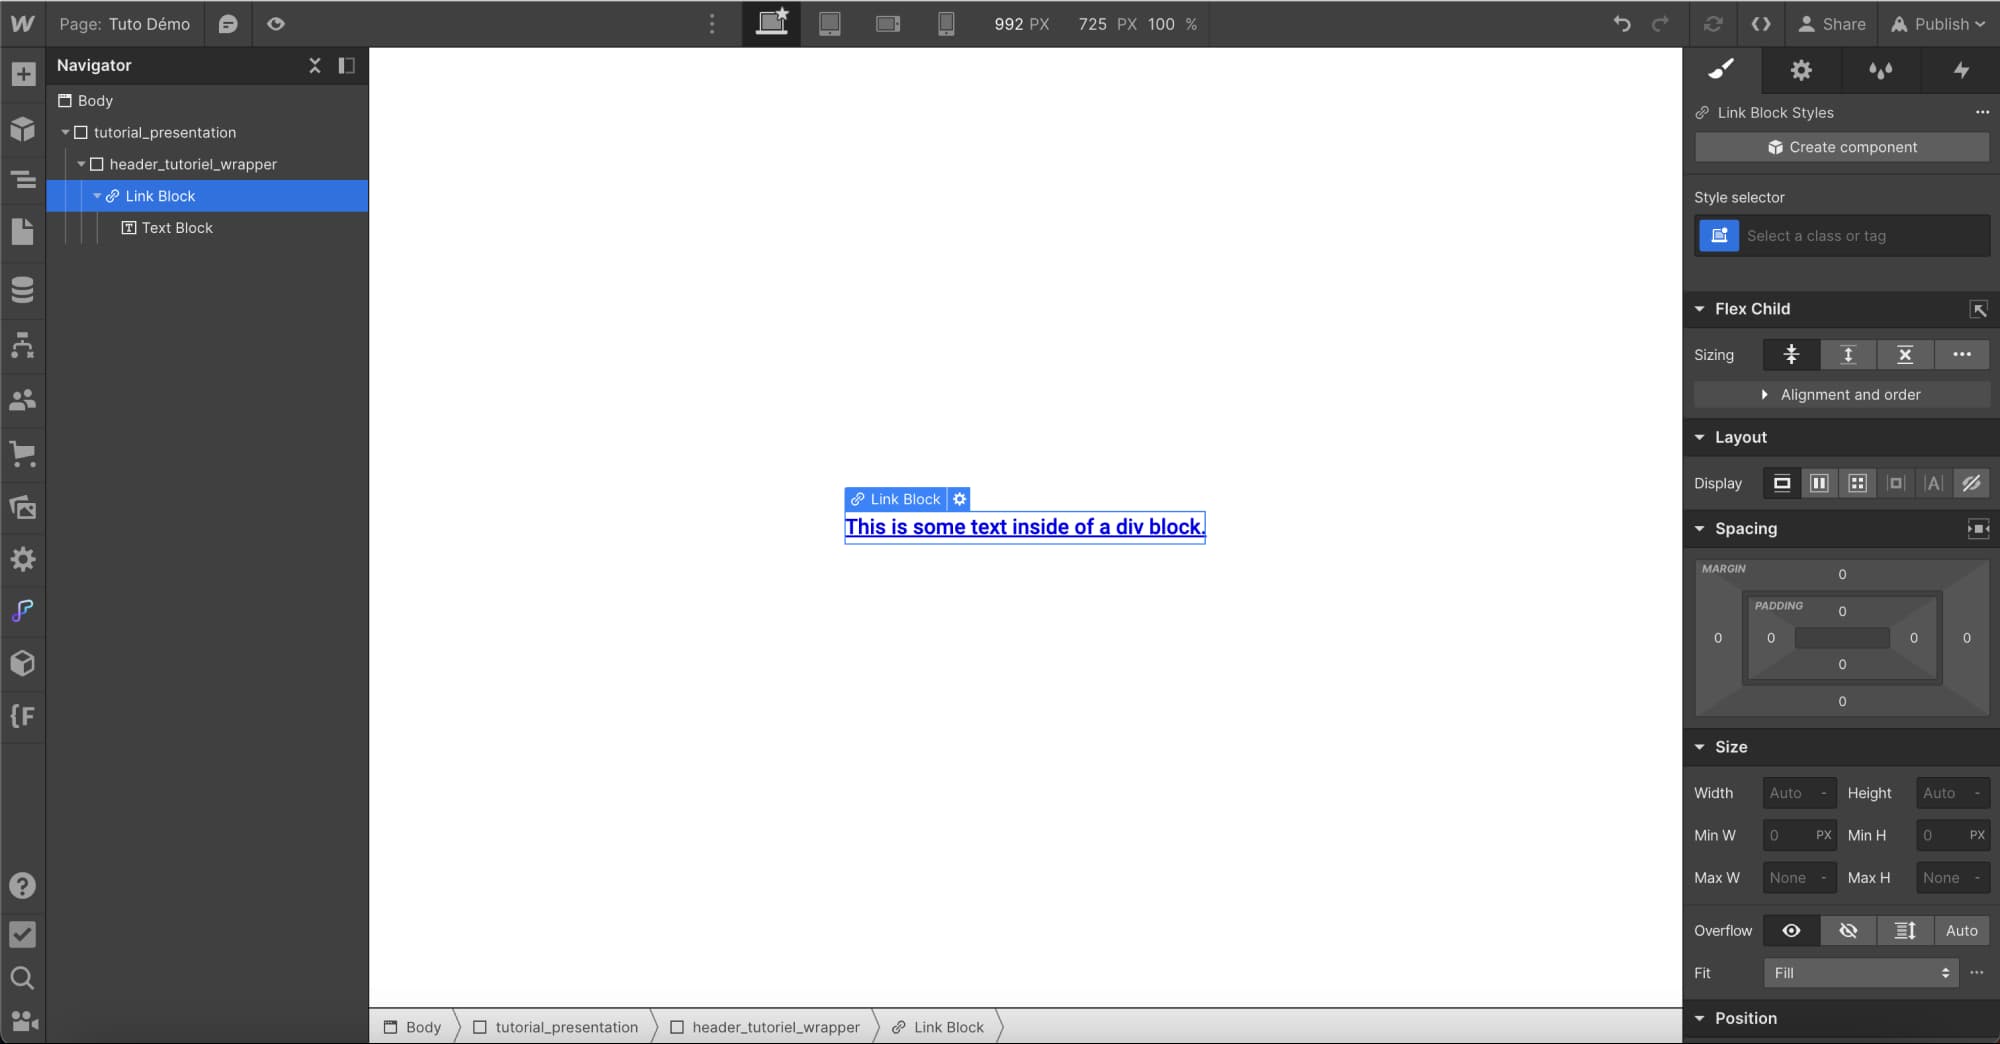
First, let's create a button and add a call-to-action text inside it.
To build the button structure:
- Drag a link block from the "Add" panel onto the Webflow canvas.
- Add a text block inside the link block.
- Double-click the default text to modify it (e.g., "Contact Us").
Now, let's adjust the size of the button:
- Select the text block.
- Open the "Style" → "Spacing" panel.
- Add a padding of 1rem on the top and bottom, and 1.5rem on the left and right.
Tip: To increase or decrease the margin or padding simultaneously on the complementary sides of an element, hold Option + drag (on Mac) or Alt + drag (on Windows).
2 - Create a linear gradient on the parent block (future border)
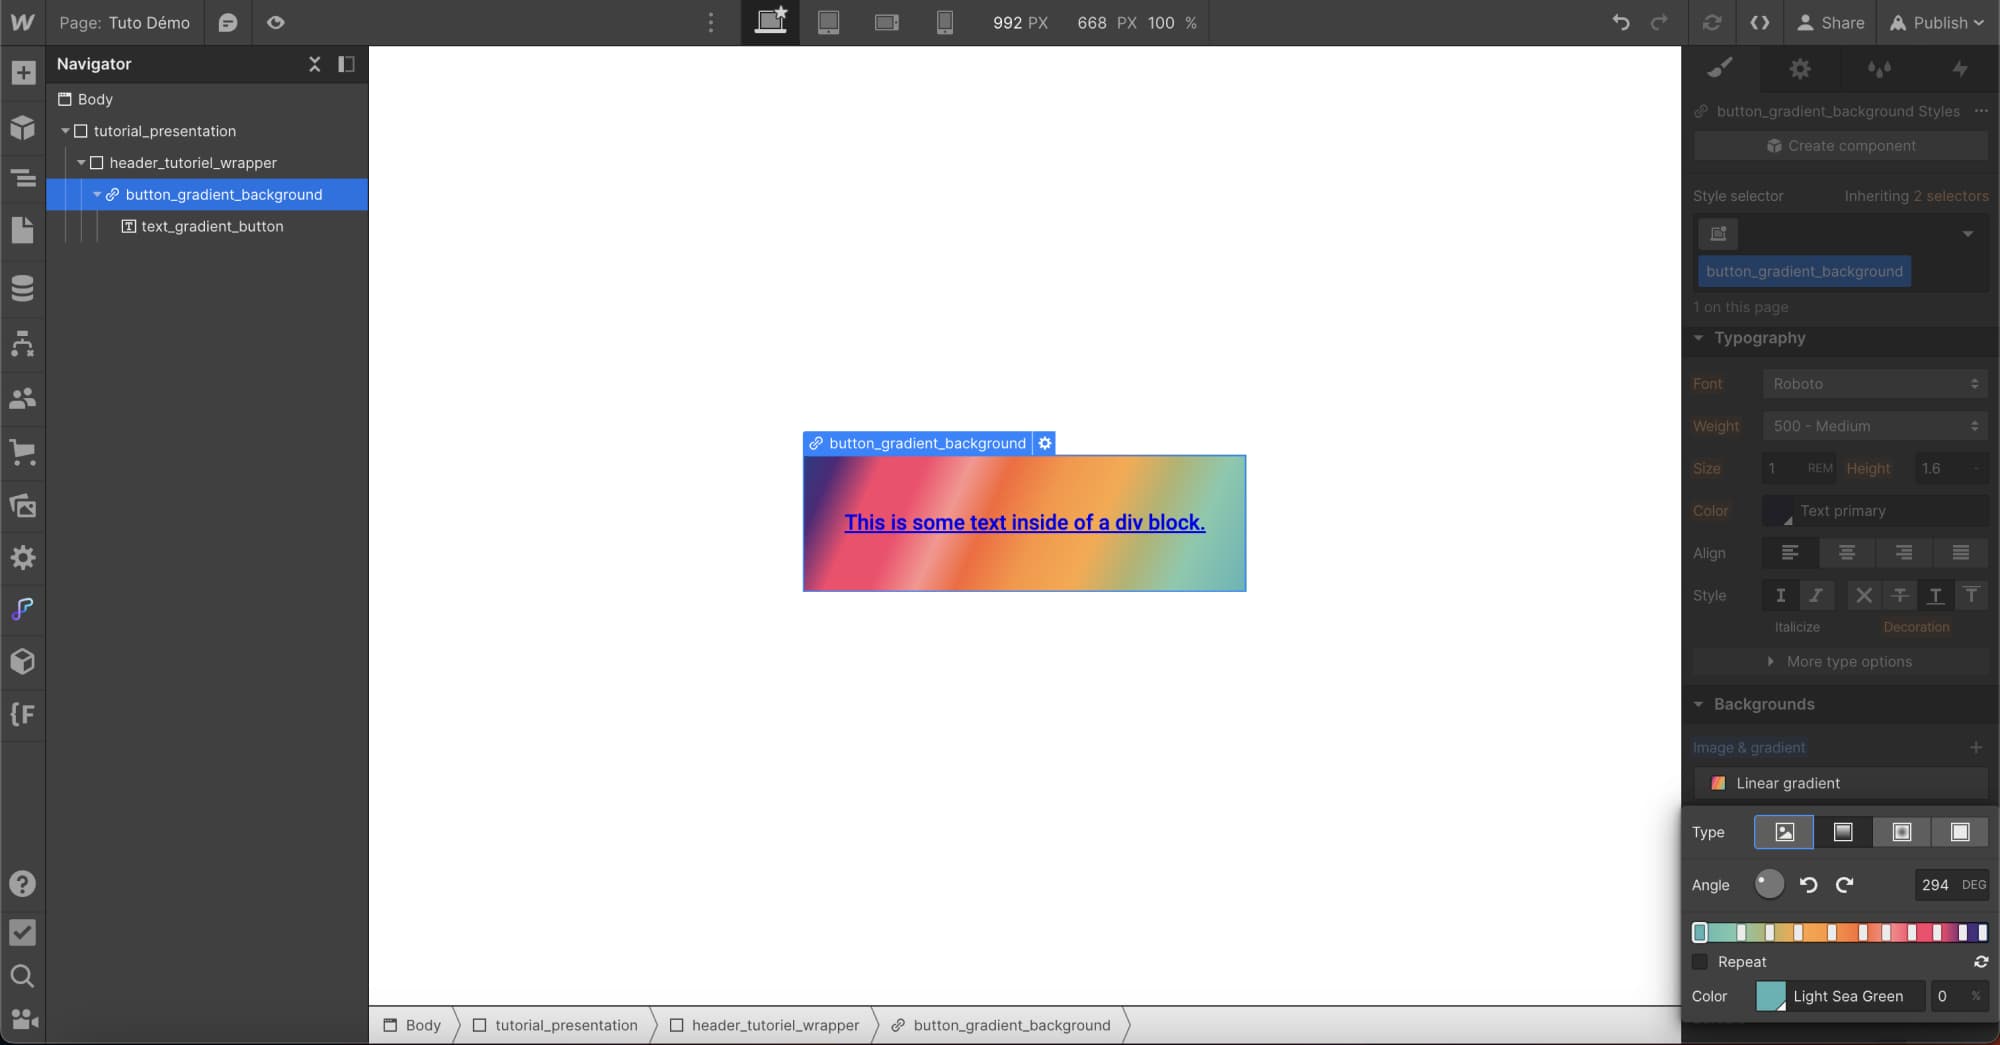
Now, you can add a color gradient border to your custom button.
To add the gradient to the link block:
- Select the link block.
- Open the "Style" → "Background" panel.
- Click the "+" icon next to "Image and Gradient" and choose "Linear Gradient" as the type.
- Change the angle of the gradient on the direction dial (e.g., 90 degrees).
- Click anywhere on the gradient bar to add a stop.
- Click on the color sample below the gradient bar to select a color stop to start building your gradient.
You can add as many stops and colors as you like; this will create the gradient.
Then, create an inner padding on the parent block with the gradient → the size of this padding will be the thickness of your border. So if you want a 1px border, you should add 1 pixel of inner padding in your CSS.
- Select the block
- Add inner padding
3 - Match the button color to the page color
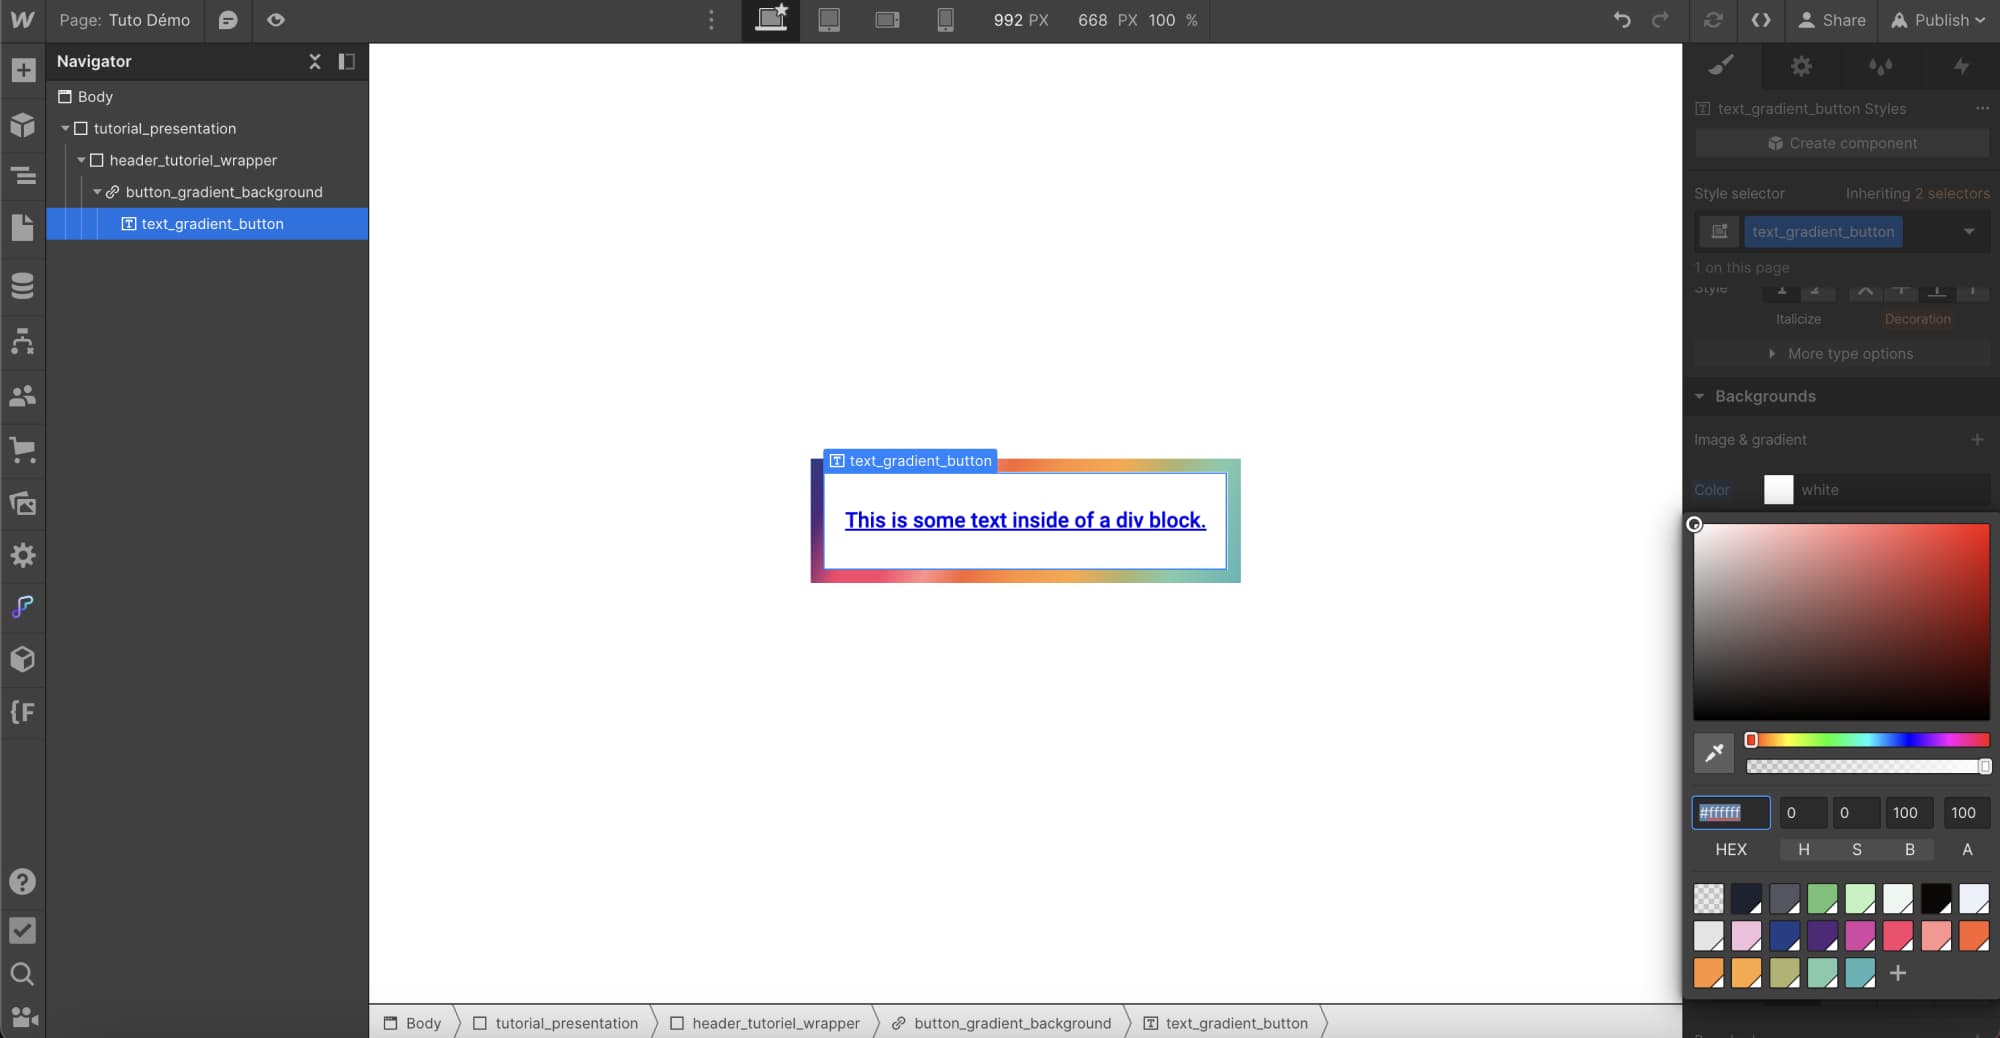
Final step!
Now you just need to align the background color of the text block with the page color to create the illusion that the parent background is simply a "border." To do this:
- Select the text block.
- Open the "Style" > "Background" panel.
- Click the sample to open the color picker and select a color to match the background color of your button with the body of your page (e.g., "white").
__________________
Conclusion
And there you have it! In three simple steps, you have learned how to create a border gradient in Webflow. To recap:
- Create a button in Webflow and adjust its size.
- Create a linear gradient on the parent block (enclosing your text block, for example) that will serve as the future border.
- Match the button color to that of the page to create the illusion of a "border."
This little "trick" allows you to enhance the aesthetics of your buttons or div blocks, even when the feature is not natively available in Webflow's CSS.
Want to learn more web design tips like this one?
→ Follow us on our YouTube channel for more guides and advice, and continue to learn, experiment, and innovate with Webflow!


.jpg)
