Discover in this tutorial the steps to follow to publish your site Webflow on a custom domain.
By publishing your website on a custom domain, you can start achieving your first SEO results!
The step-by-step guide
Step 1: Purchase a custom domain
There are various domain name providers. Watch this video tutorial to learn how to purchase and manage a domain on the Google Domains platform:
You must own a domain name to connect your Webflow site to it.
Step 2: Subscribe to a paid plan
Webflow offers the ability to publish your site for free on a "webflow.io" version. If you wish to publish your site on a custom domain like "digidop.fr," you will need to upgrade to a paid plan.
Add a paid plan (basic, CMS, pro, advanced, etc.) to your Webflow project.
Step 3: Add the custom domain to your Webflow project
- Open the "project settings" for your particular project
- Go to the "Hosting" tab
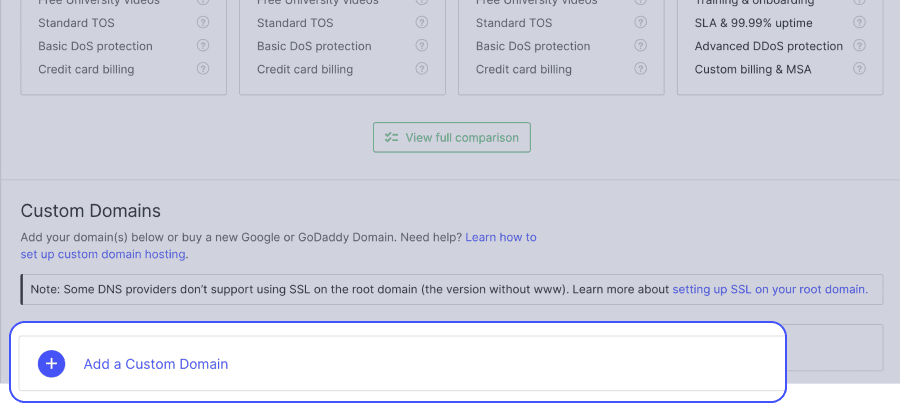
- Scroll down to the "custom domain" section
- Click on "Add a custom domain"
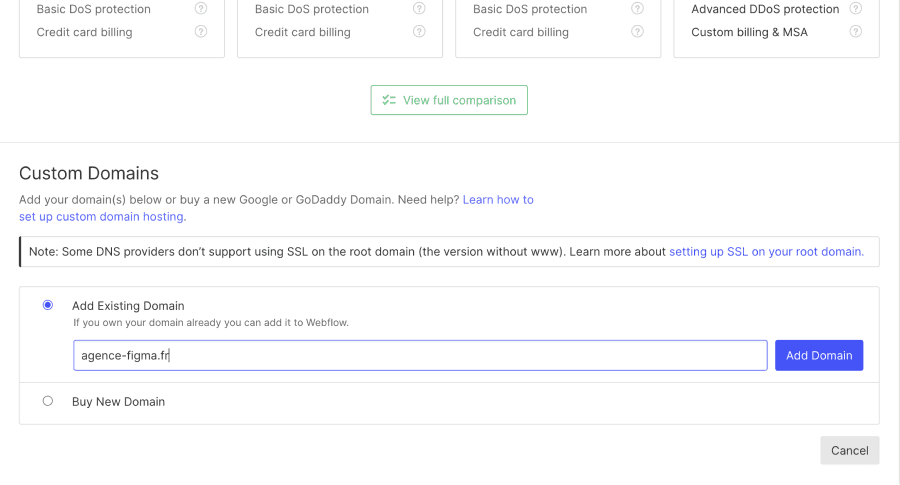
- Enter your root domain (yourdomain.com). This will add both the root domain (yourdomain.com) and the full domain (www.yourdomain.com).
Step 4: Connect the DNS fields and A record
Go to your account (OVH, Google, CloudFlare, etc.) to configure the DNS for your Webflow site.
( ⚠️ If you had an existing configuration, remember to delete the settings from your old WordPress site, for example)
A record
Add 2 A type fields with the value (Host @)
- 75.2.70.75
- 99.83.190.102
DNS
Add a CNAME type field (Host www)
- proxy-ssl-webflow.com

Step 5: Check and publish!
- Check
- To verify that the records on your hosting have been updated correctly, click on "check status." If you see...
- An issue detected with an alert icon: there is a problem. Ensure you entered the fields without typos.
- A green tick with the word "connected": the server is ready. Proceed to the next step.
- Publish!
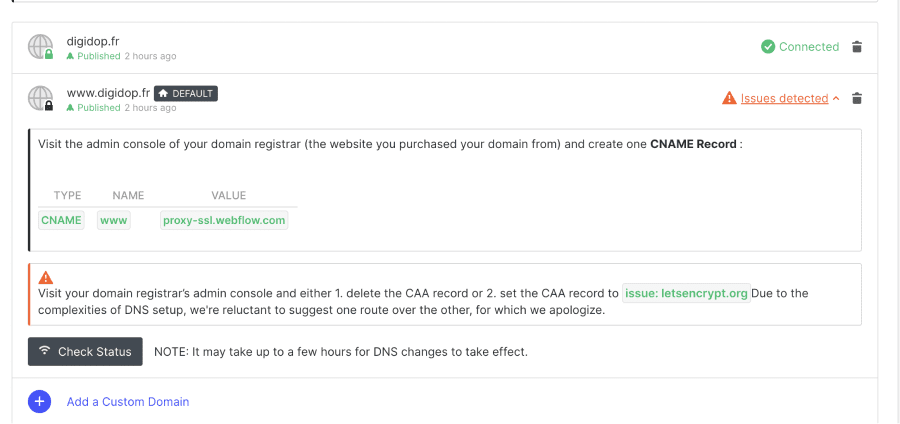
If the tick is green... all that's left is to set your default domain by clicking on "make default" when you hover over your domain name. Then, check this same domain in your settings, under the Publish button. Click on "Publish to selected domain" to make your new website live.
⚠️ Depending on your hosting provider, DNS propagation may take some time. It can range from 24 to 72 hours. If you are using Google Domains or CloudFlare, it is generally very fast (under 15 minutes).


.jpg)
