Webflow is gradually repositioning itself as a Website Agentic Platform, and while more and more native AI features are being added to the platform, the AI currently getting the most attention is Claude.
It has always been possible to connect it to Webflow via MCP, but until a few months ago, the integration was still quite technical. Now, with the Webflow MCP Bridge app, you can connect and start using Claude with your Webflow workspace in less than 5 minutes.
So what can you actually do with it, and how do you connect Claude to your Webflow project? Let’s break it down in this article.
What you can do with Claude MCP Bridge
The new Webflow app allows you to connect your Webflow project with your Claude account and perform actions directly from your chat window. For example, you can:
- Audit your site: broken links, missing alt text, incomplete meta descriptions
- Create sections or landing pages simply by describing what you want (with some limitations to consider from a design system perspective)
- Generate copywriting for your pages
- Translate content at scale across your website
- Update items in your CMS
In short, you can manage your Webflow site through prompts, without even opening the Designer. (Useful if you want to work from your mobile, for example 😉)
How to connect Claude MCP to your Webflow project?
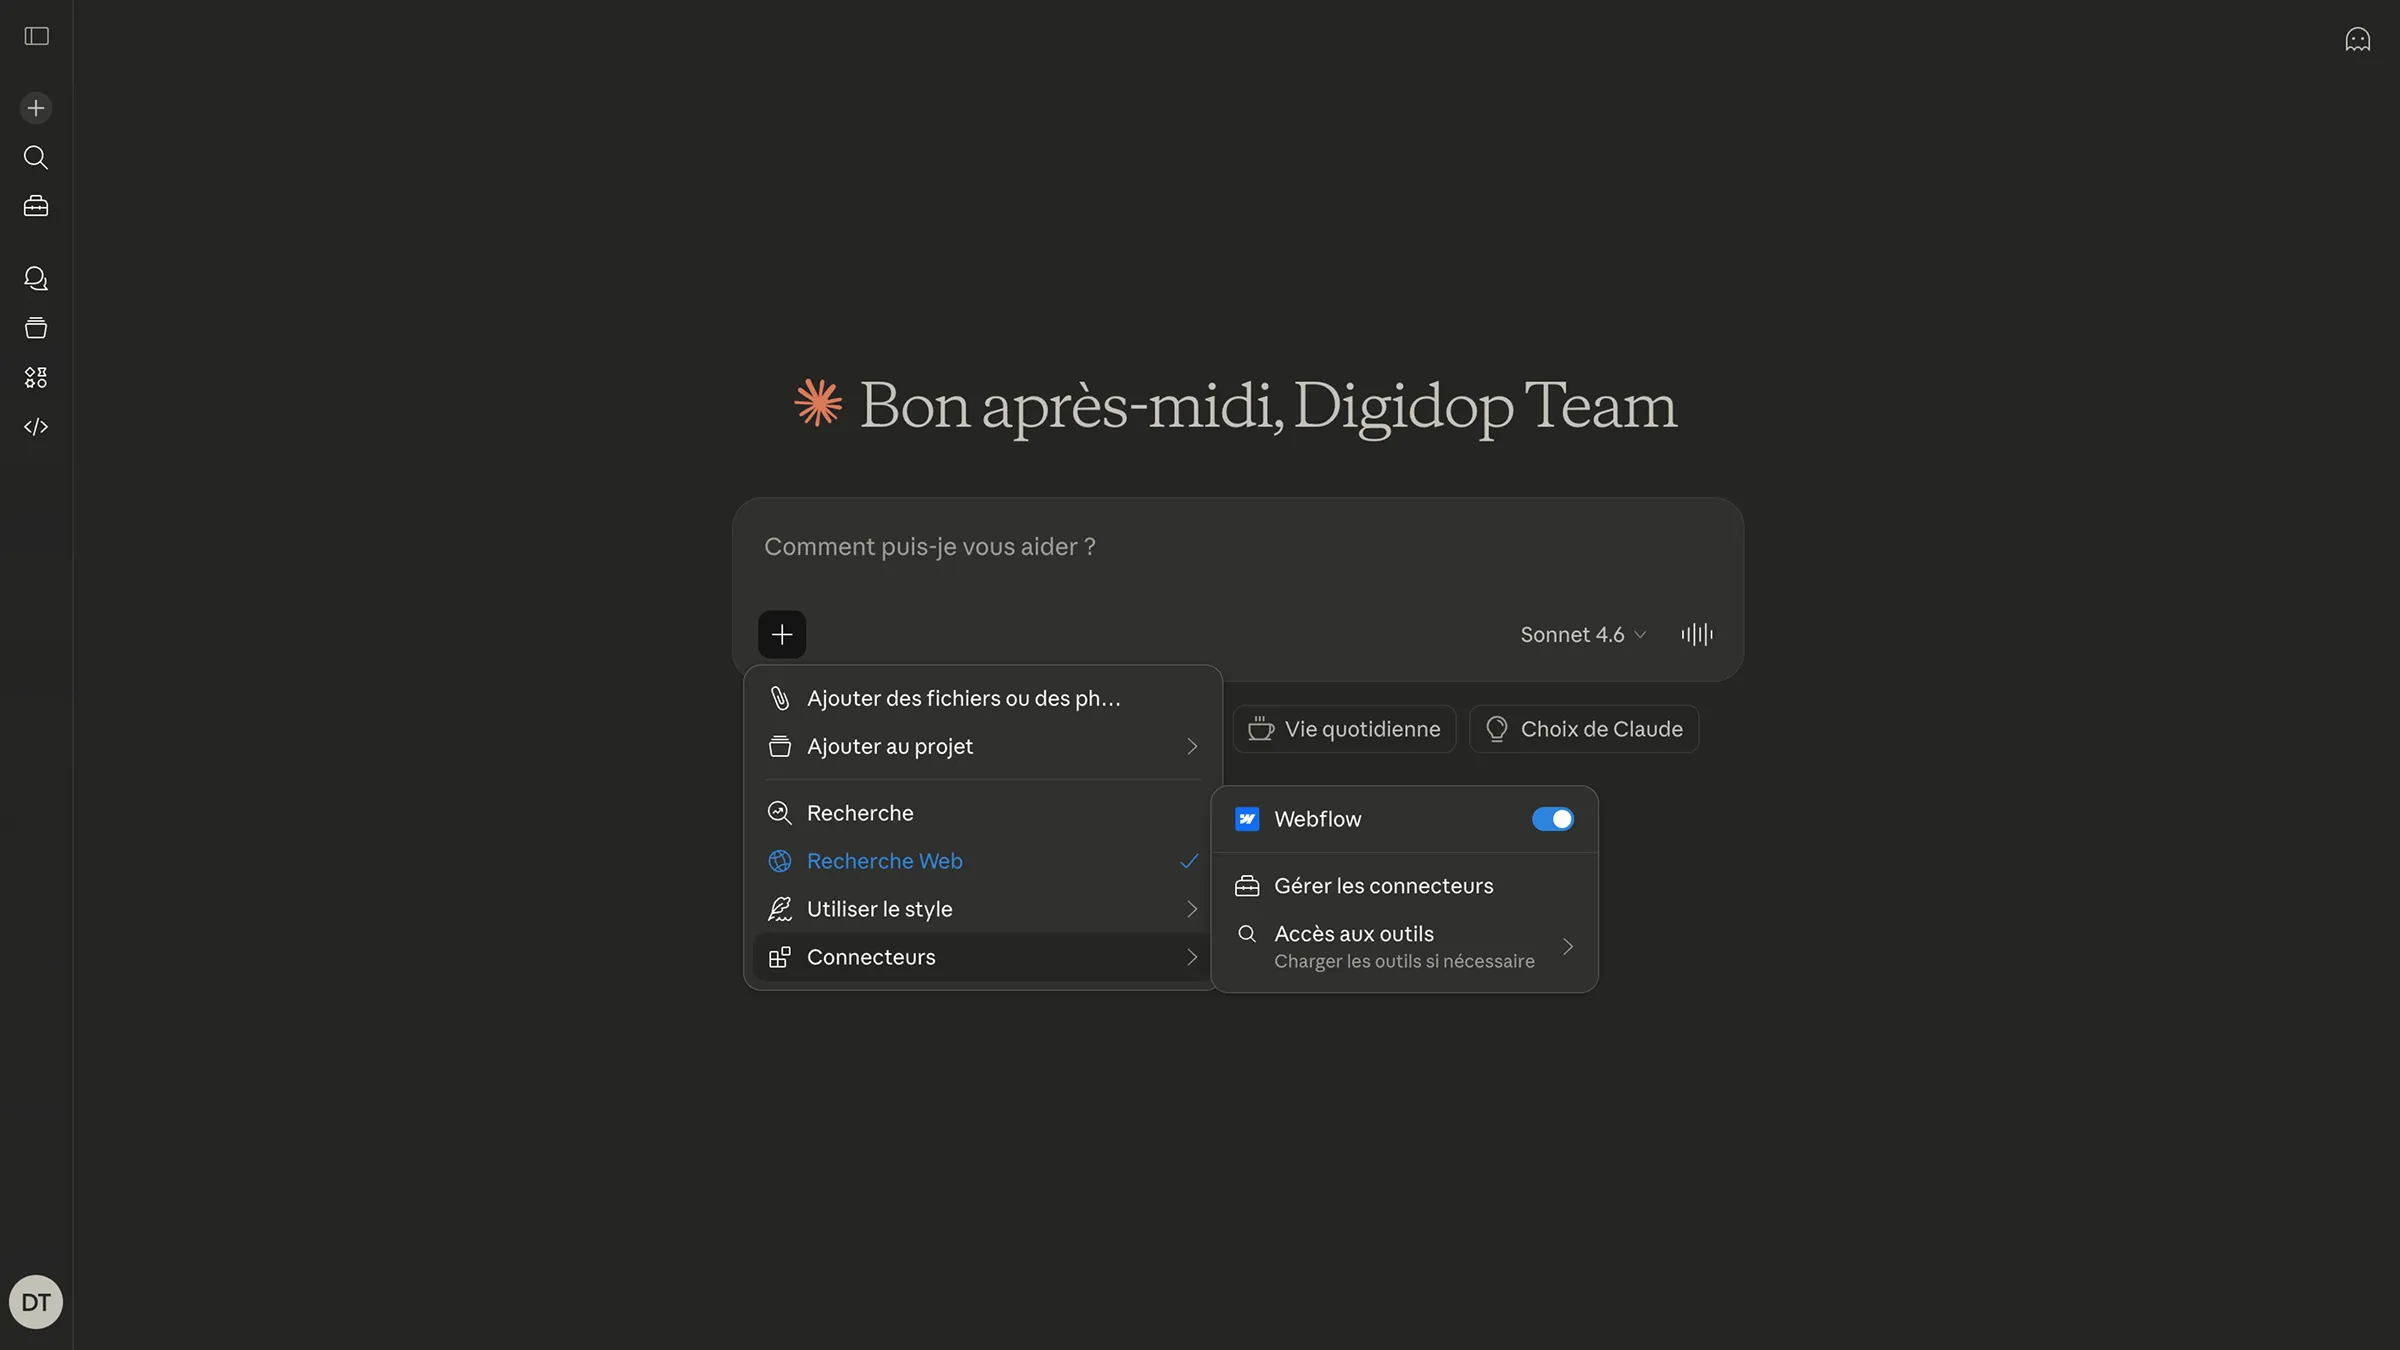
1. Add the Webflow connector in Claude
In the Claude chat window, click the + icon, then click on Add connectors. Search for the Webflow connector and click Connect.
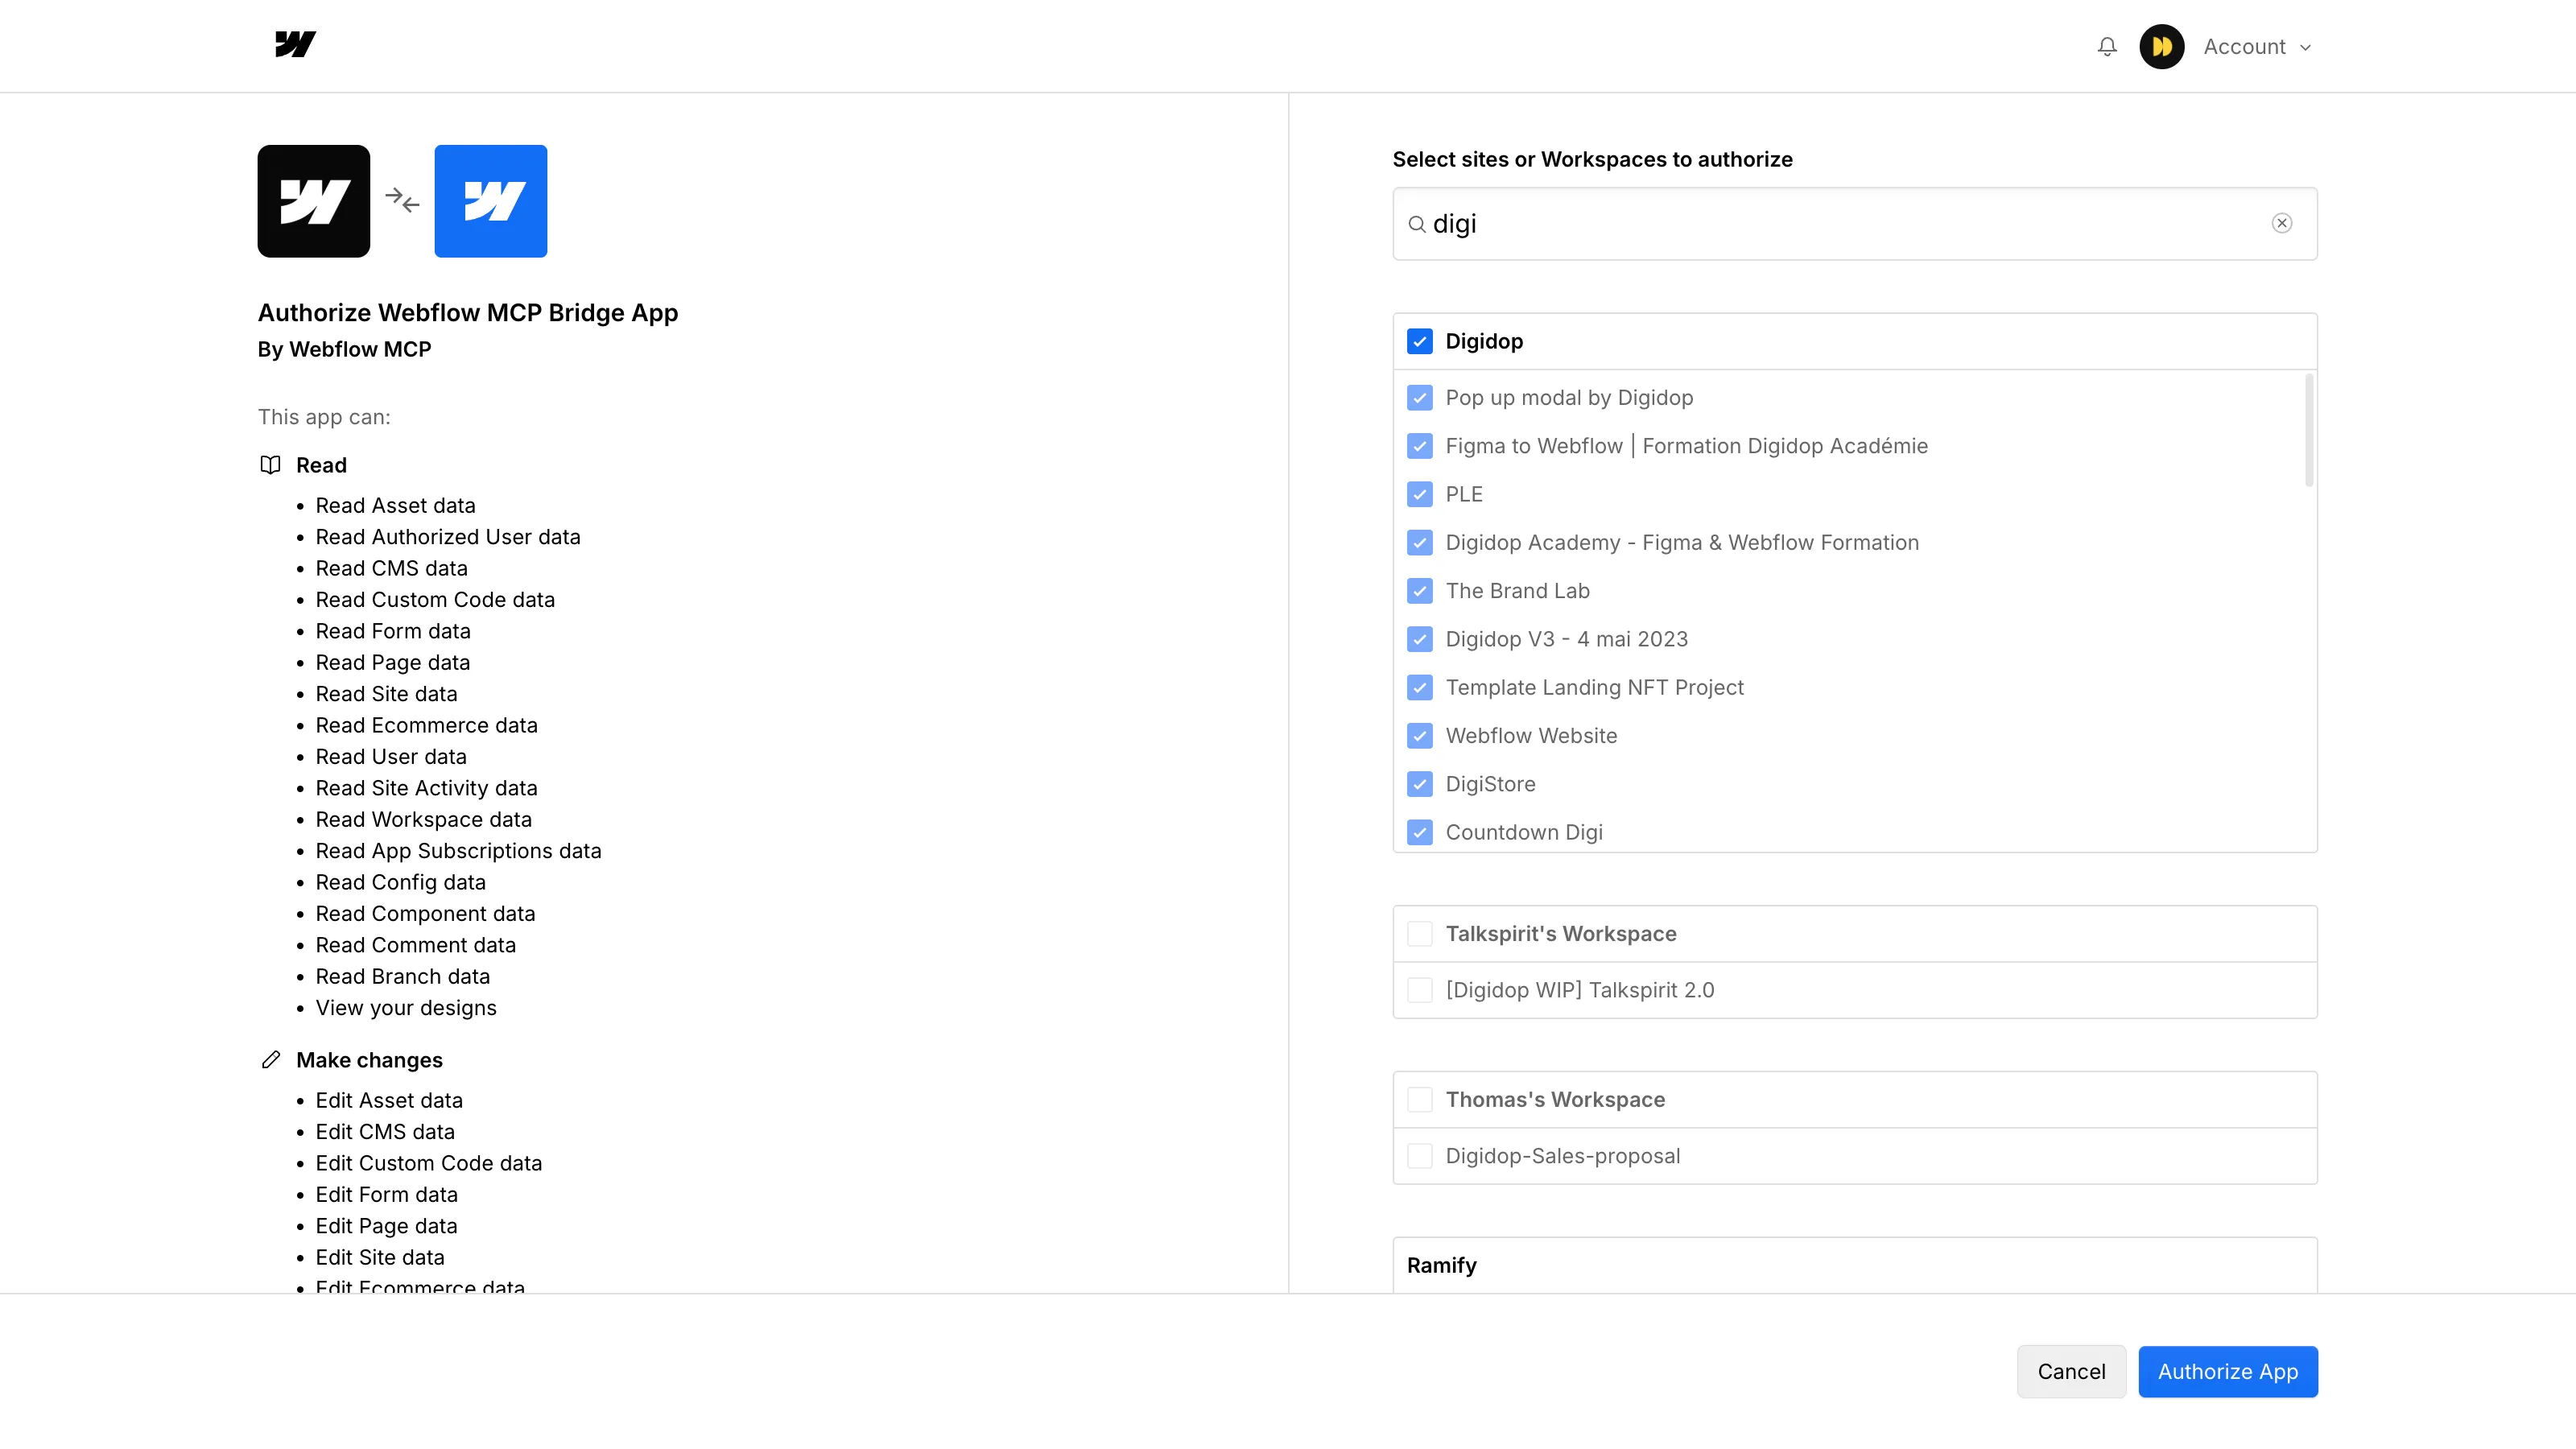
2. Authorize access to your Webflow account
Claude will ask you to log into your Webflow account in a new tab and grant the required permissions. Then select the sites and Workspaces you want to give access to, and click Authorize App.
3. Install the app on your Webflow project
Once access is granted, the Webflow MCP Bridge app is automatically installed in your Webflow workspace. You don’t need to install it manually. (It’s also not available on the public marketplace.)
4. Open the Webflow MCP Bridge App in the Designer
To use the MCP Bridge app:
- Open the Apps panel in the Designer (keyboard shortcut: E)
- Launch the Webflow MCP Bridge app
- Wait for it to connect to the MCP server
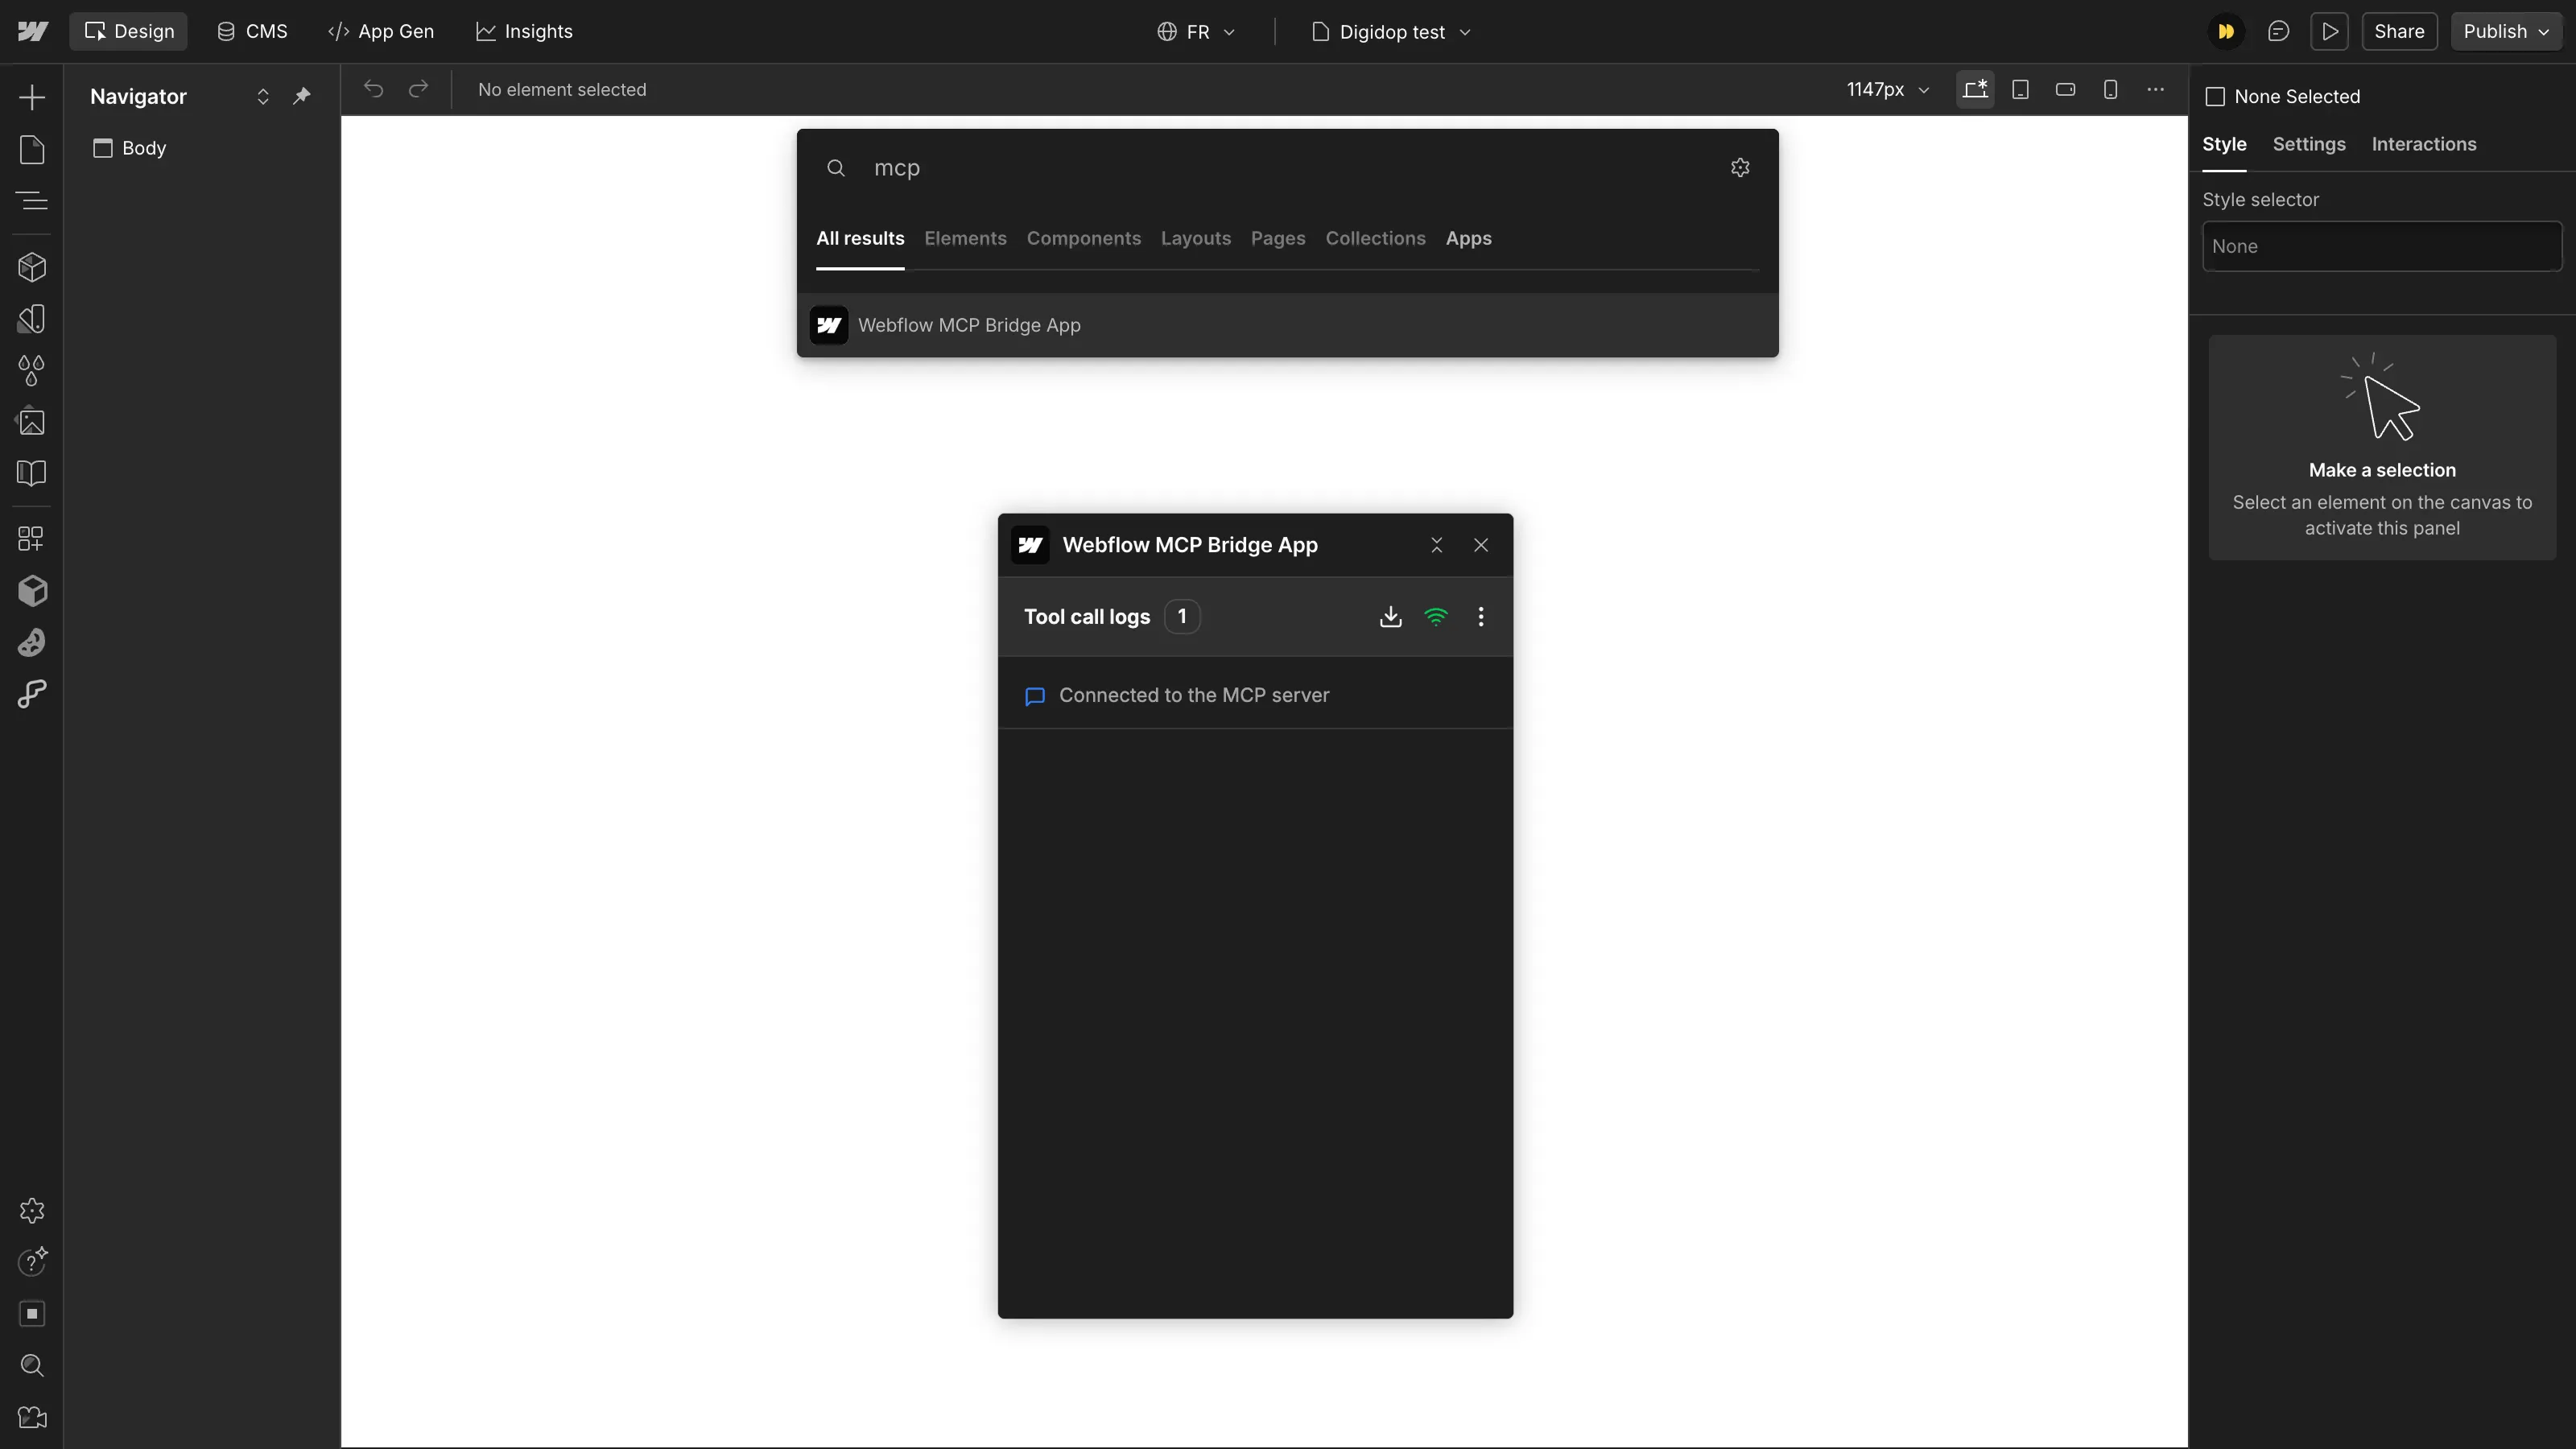
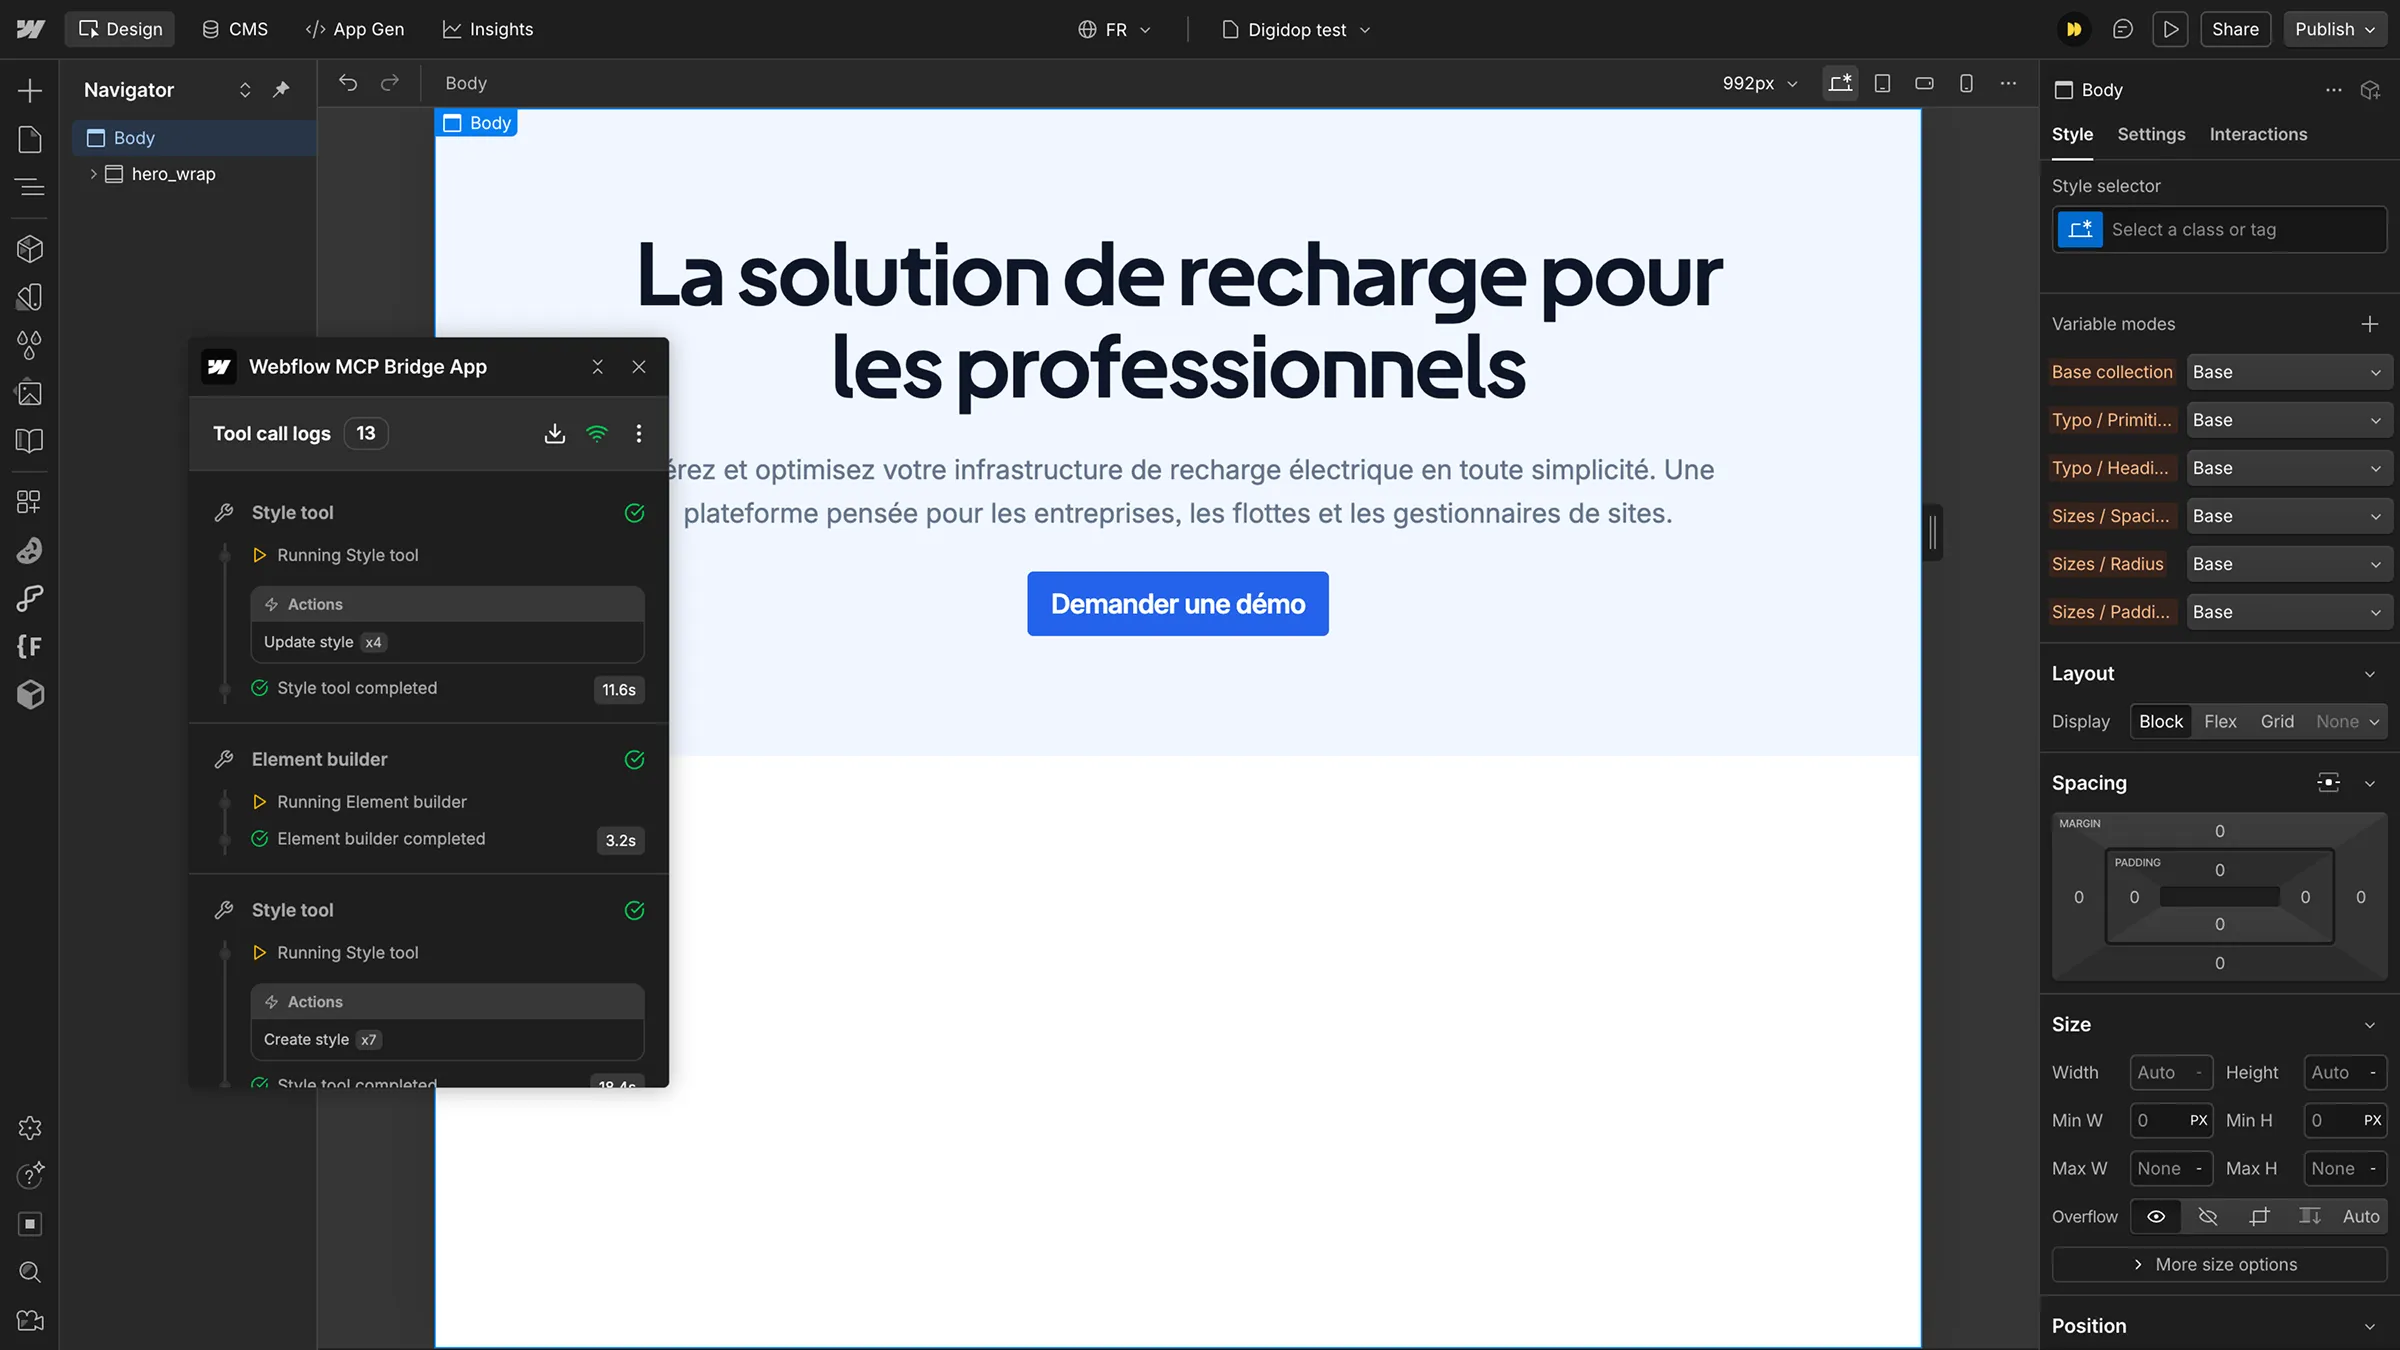
Once connected, Claude has access to your project and can directly interact with the Webflow platform.
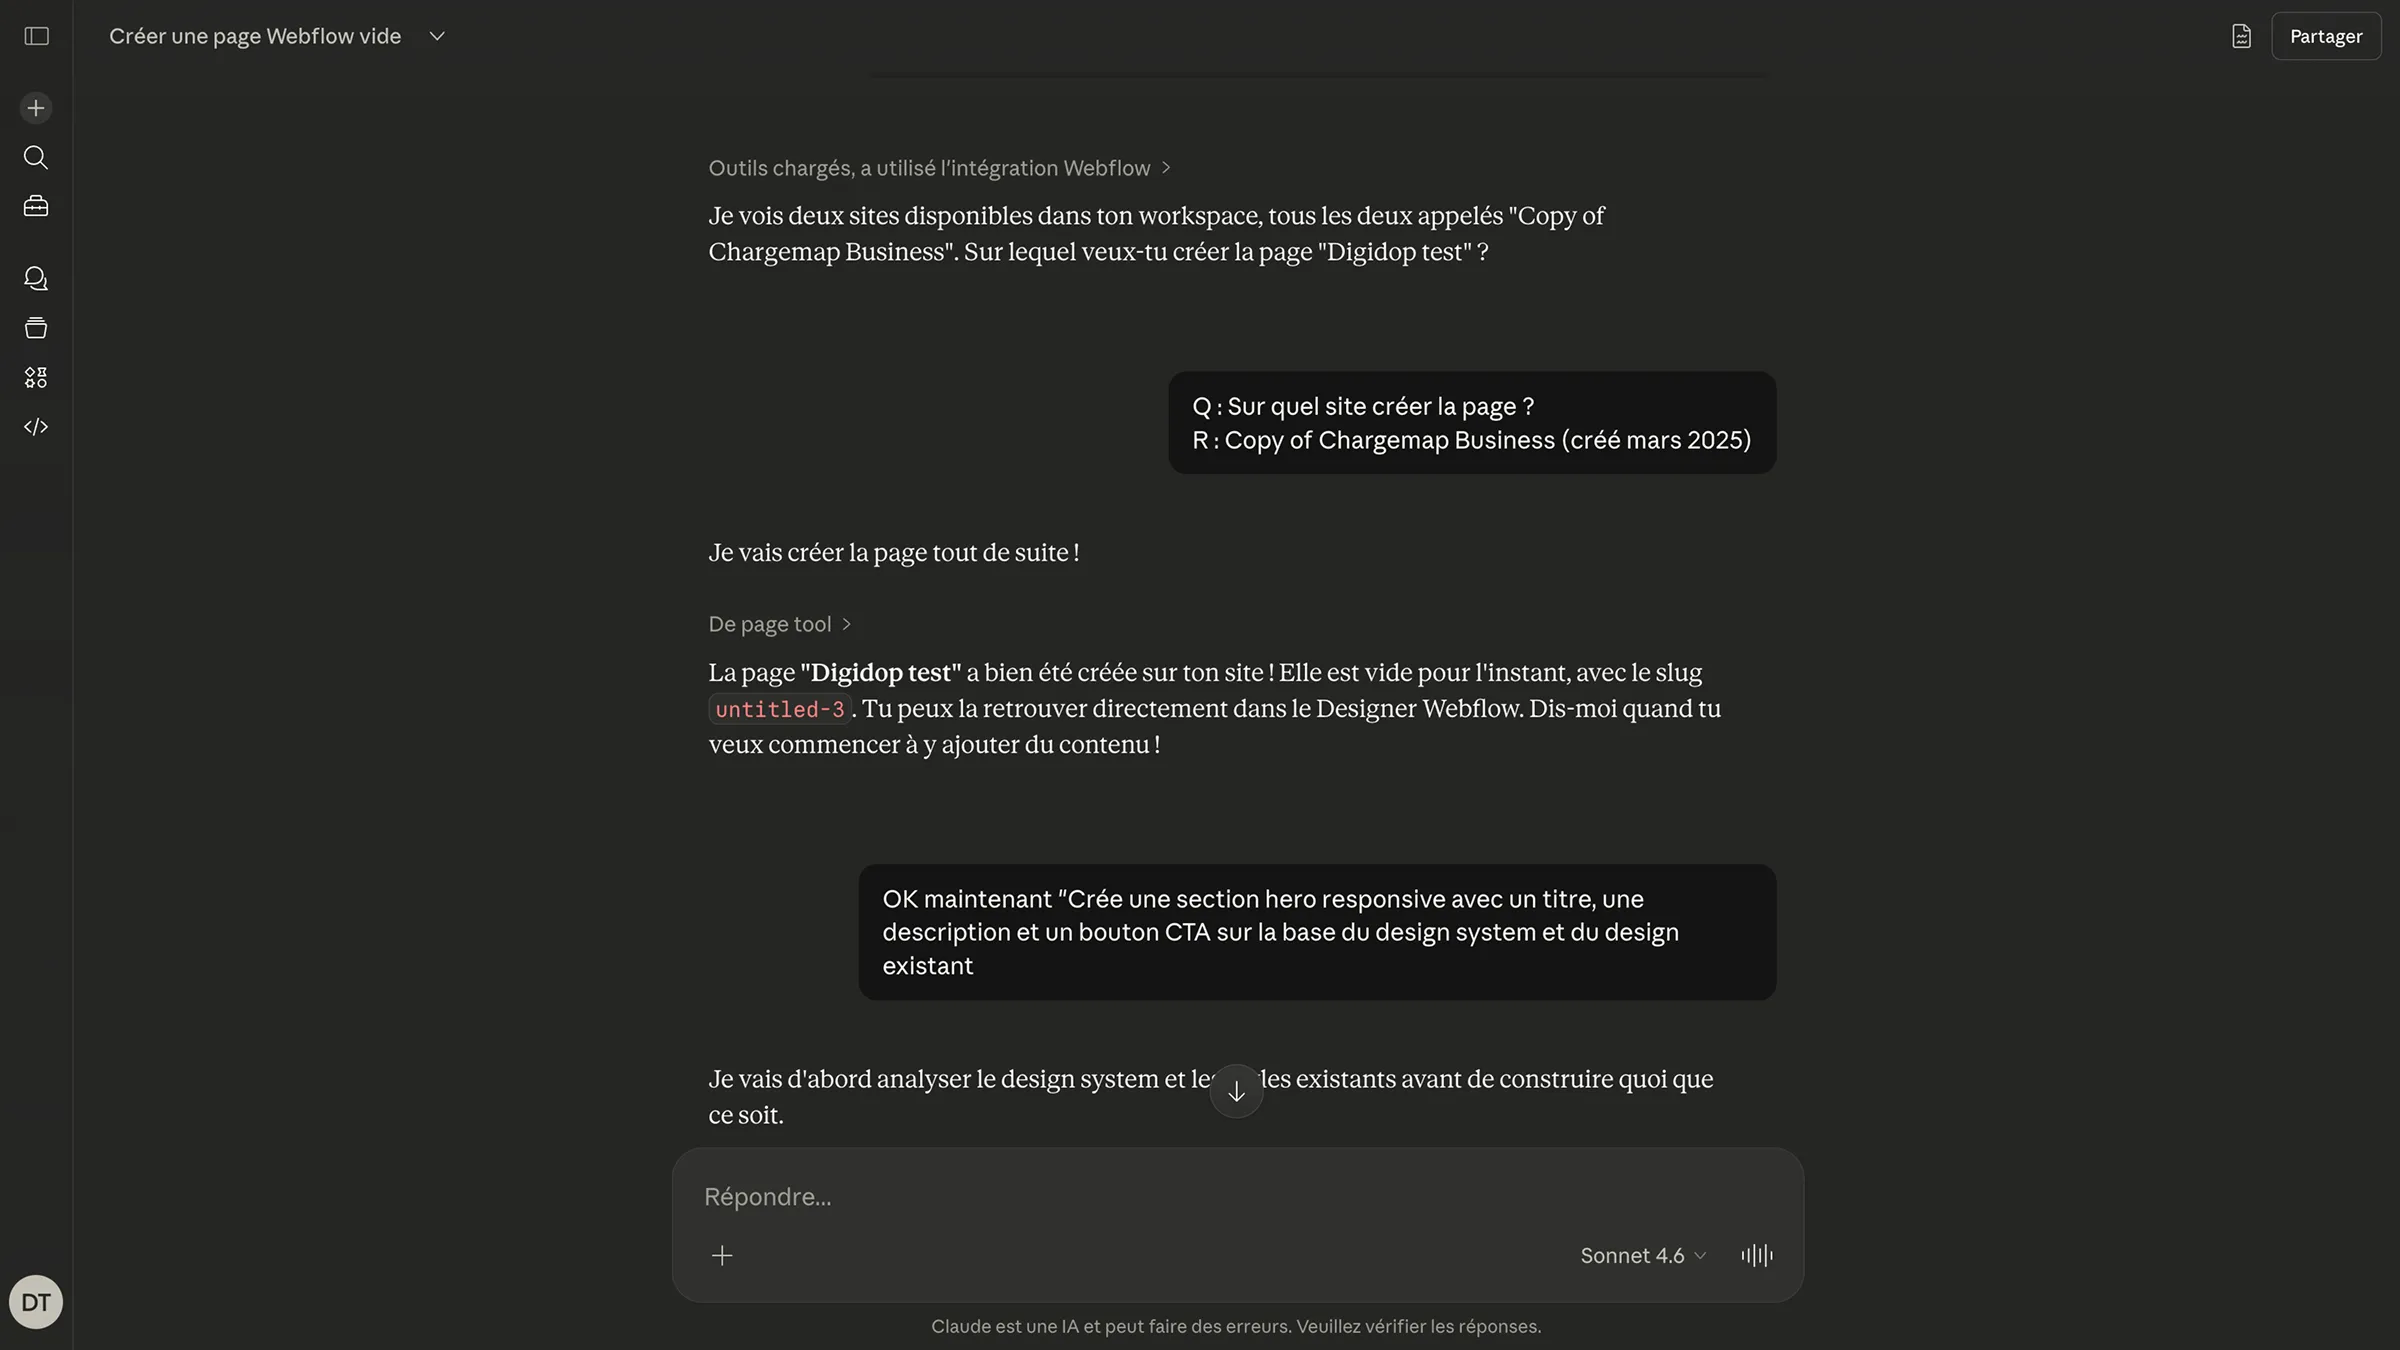
5. Write your first prompt
You can now directly tell Claude what you want to do on your site. Here’s an example to get started:
“Create a responsive hero section with a title, a description, and a CTA button, based on the existing design system and design.”
Limitations of the MCP Bridge App
Webflow is making strong progress toward becoming an agentic platform, but some limitations remain, mainly due to platform legacy and the current state of AI:
- Development speed is still relatively slow compared to other vibe coding platforms (Lovable, Claude Code, etc.)
- The MCP Bridge app must stay open in the Designer for the connection to remain active
- Some complex actions are still out of reach for now
- Output quality heavily depends on how precise your prompts are
⚠️ Heads up — On large sites with an established design system, a poorly worded prompt can lead Claude to modify existing classes or values and create conflicts at scale. Use it carefully.
Conclusion
Webflow is moving in the right direction by reducing the complexity of integrating AI (and available tools on the market) into the platform. While the app still has some structural limitations, it already enables powerful use cases and reinforces Webflow’s shift toward an AI-friendly platform.


.jpg)

.jpg)
