
Webflow is a powerful tool for creating websites without the need for coding. One of the advantages of Webflow is its built-in content management system (CMS), which allows you to easily manage and structure your site's content.
In this article, we will explain to you how to export your Webflow CMS data to a CSV file, step by step. This way, you can backup your collection items (and/or your products if it's an e-commerce site), import them into other Webflow projects, or transfer them to other platforms like WordPress.
Be sure to check out our YouTube channel for supplementary content to this written guide.
Part 1: Exporting Content from a CMS Collection
To export the content of a CMS collection, follow these steps:
- Open the Webflow Designer.
- Go to the Collections panel.
- Select the Collection you want to export.
- Click the "Export" button.
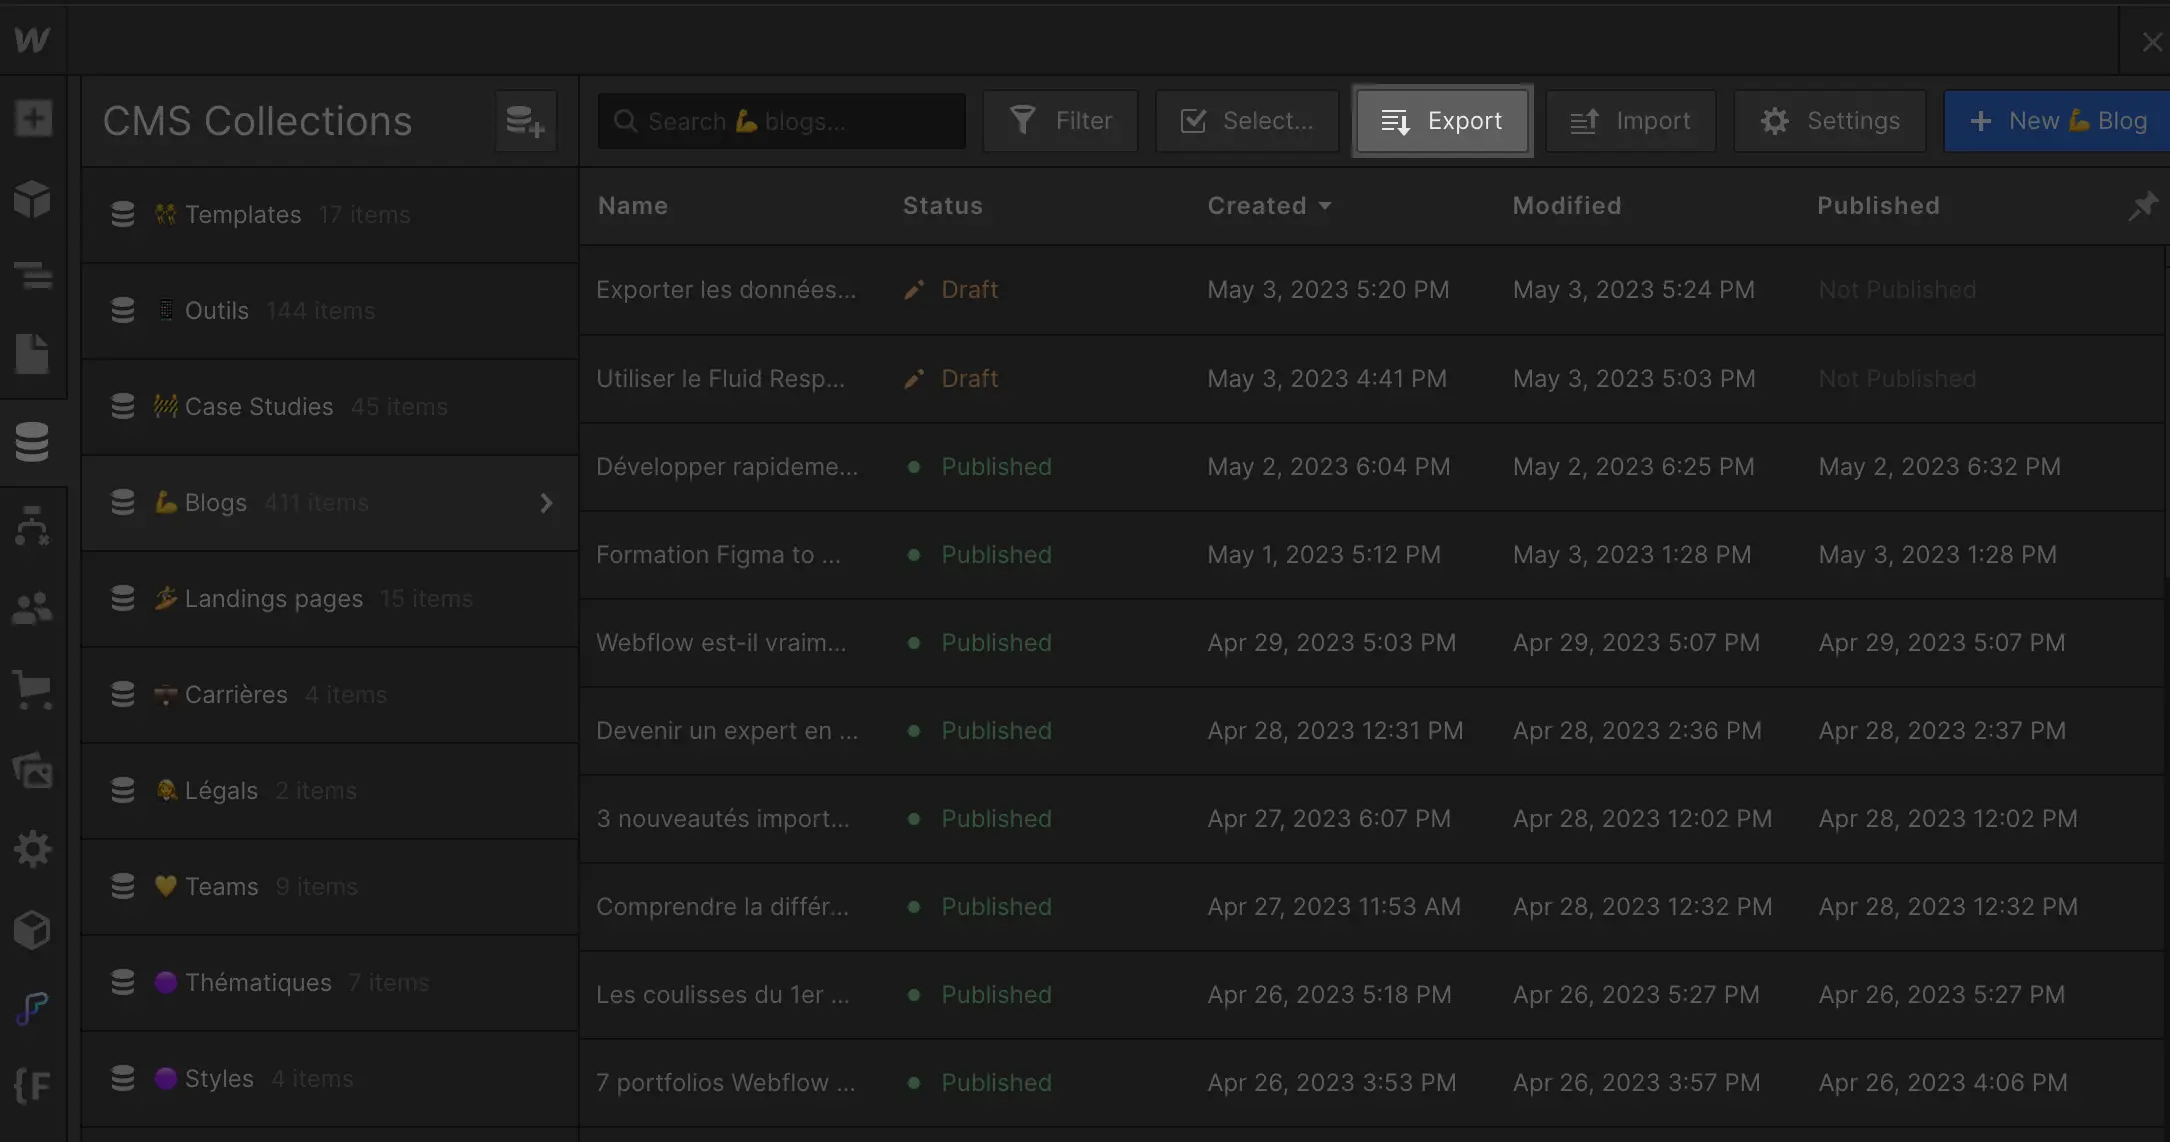
Note: You can choose to export all the content of your Collection (including archived items) or to selectively export individual items.
Part 2: Exporting Content from E-commerce Collections
Exporting products and their categories is done by exporting the product Collection. Here’s how to do it:
- Open the Webflow Designer.
- Go to the E-commerce panel.
- Select the product Collection.
- Click the "Export" button.
Whenever you export the product Collection, the CSV file will contain all products, their variants, and categories, including archived items. The CSV file is structured with the same product schema required for importing, making it easy to use this file to import your products into a new Webflow e-commerce project.
Part 3: Understanding How Collection Fields are Exported
Most Collection fields, including reference fields, are exported as plain text strings or URLs. Multi-reference fields and product categories are exported as a comma-separated list of text. Rich text fields are exported in HTML. Images and files are exported as URLs hosted by Webflow.
Note: When exporting products, custom fields will not be included in the exported CSV in this version of the "product export" feature.
Conclusion:
Exporting your Webflow CMS data is a simple and quick process. Whether you want to backup your collection items and products, import them into other Webflow projects, or move them to other platforms, this step-by-step guide will help you achieve that.
Don't forget to check out our YouTube video (online tomorrow) for a visual supplement to this written guide.
Also, discover how to import your CSV data into your Webflow CMS in this article 👉
Want to learn more about Webflow? 👇
- The Digidop blog (+400 how-to articles)
- The Digidop YouTube channel (content in French on Figma, Webflow, and Web design)
- The Digidop Academy: free training in French on Figma, Webflow, and Web design


.jpg)
