
The new Variables feature in Figma takes web design possibilities to new heights. With these variables, you can create even more powerful prototypes by utilizing an integrated logic system. In this article, we will guide you step by step to create a Dark & Light Mode using variables in Figma. This will enable you to provide an optimal visual experience for your users based on their color preferences.
1. Adding Color Variables in Figma
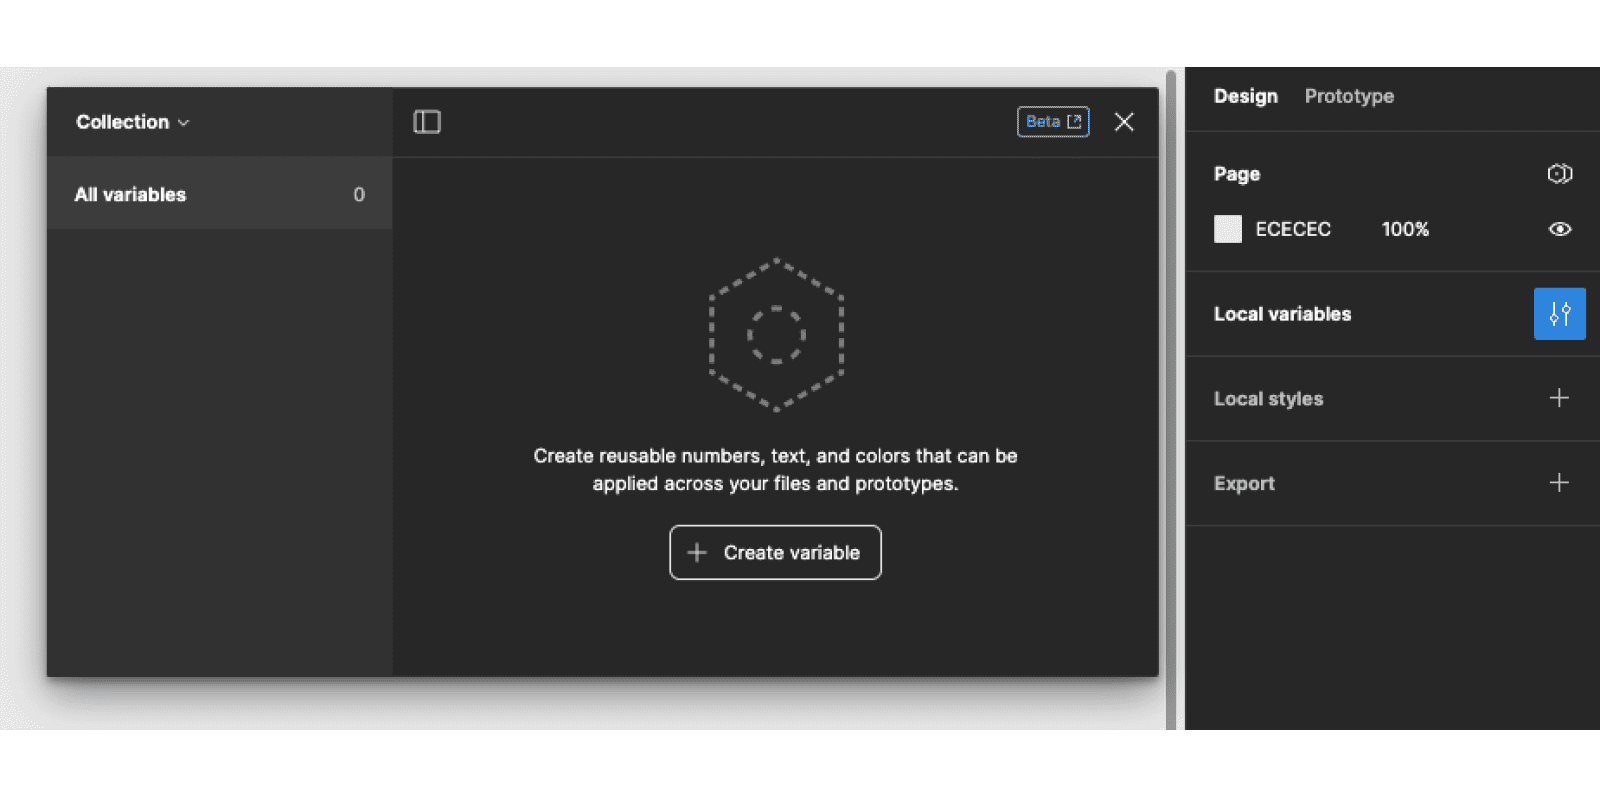
Start by creating variants to define the different colors for your project. These variables will allow us to centralize all styles used in the prototype and change colors with just one click. From the design panel, follow these steps:
- Click on "Local Variables"
- In the variables table, click on "Create variable"
- Choose the "Color" variable
- In the Name column, assign a name to your color. For example, use numbers within the same color family, like 100 / 200 / 300 for different shades of gray.
- In the Value column, assign a value to the color by adding a HEX code.
- You can group colors from the same family by selecting the colors, right-clicking, and then clicking on "New group with section"
- Left-click on the collections list, click on "Rename Collection," and rename your collection "Colors"
2. Create a Second Collection for Uniformity in the Prototype

Now we will define how each of the colors will be used in our project. To maintain uniformity in the prototype, it's crucial to designate primary and secondary colors for each graphic element: texts, backgrounds, borders, etc. Therefore, we will create a new collection called "Tokens," where we will list the possible uses and connect the colors from our "Colors" collection. Follow these steps:
- Add variables for texts, backgrounds, and borders by defining "Primary" and "Secondary"
- Click on the color
- Go to "Libraries" and choose the color from the "Colors" collection that you want to connect.
- Group your Primary and Secondary for Texts, then for Backgrounds, and finally for Borders
3. Create a Second Mode in the Collection
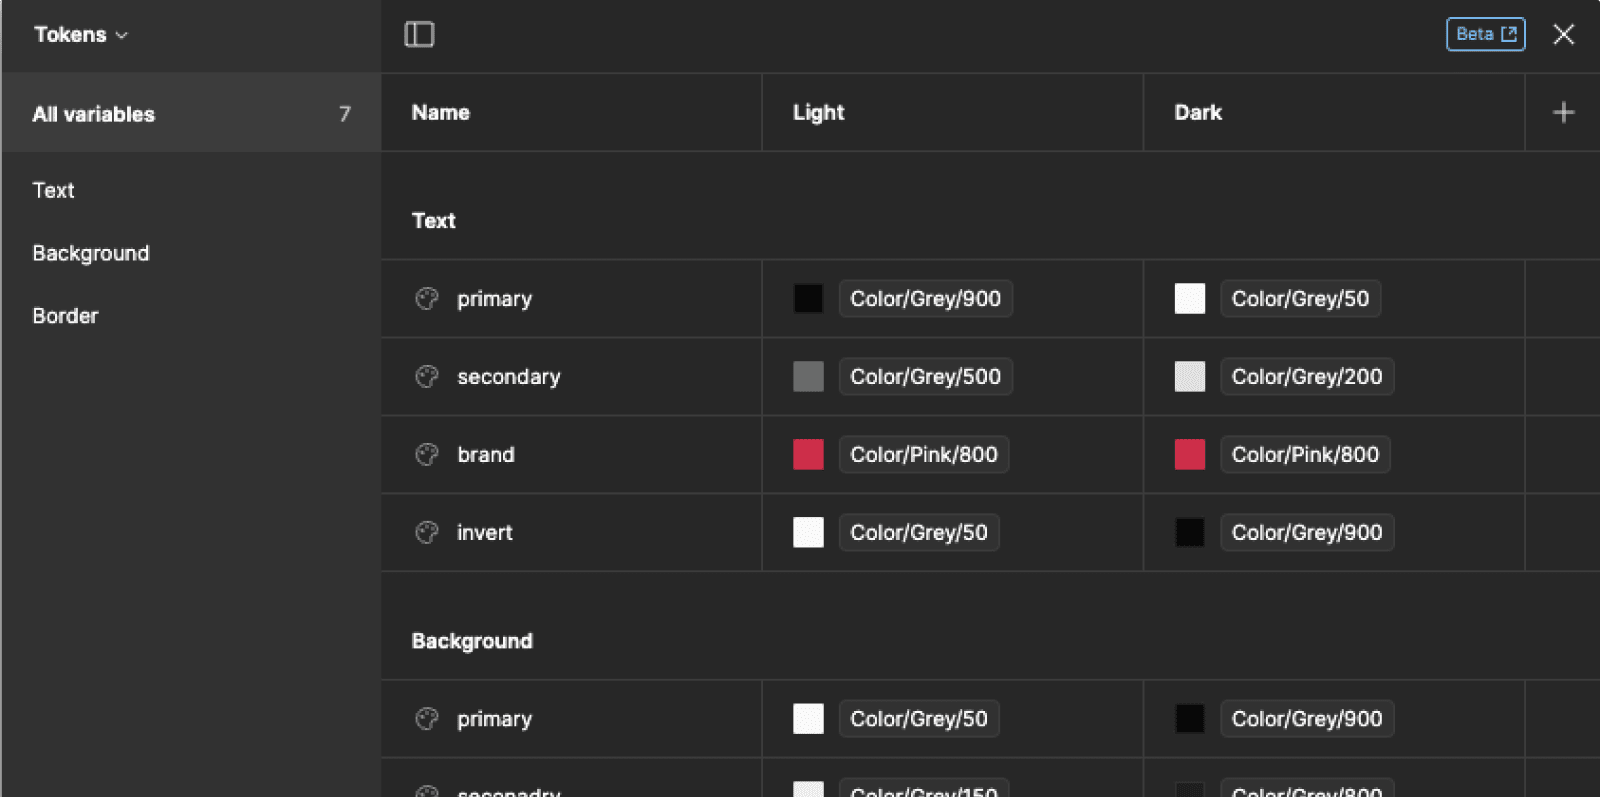
You have just defined all the colors for your project and assigned them to specific uses. However, you have done this for only one mode. Now, you need to create a second mode where you will define new colors. Follow these steps:
- From the "Tokens" collection, click on the "+" icon in the top right to add a new column and thus a new mode.
- Rename your two modes, for example, "Light" for the first one and "Dark" for the second, by right-clicking on the header.
- For each row in this new column, customize the color for your Dark mode
4. Connect the Variables to the Design
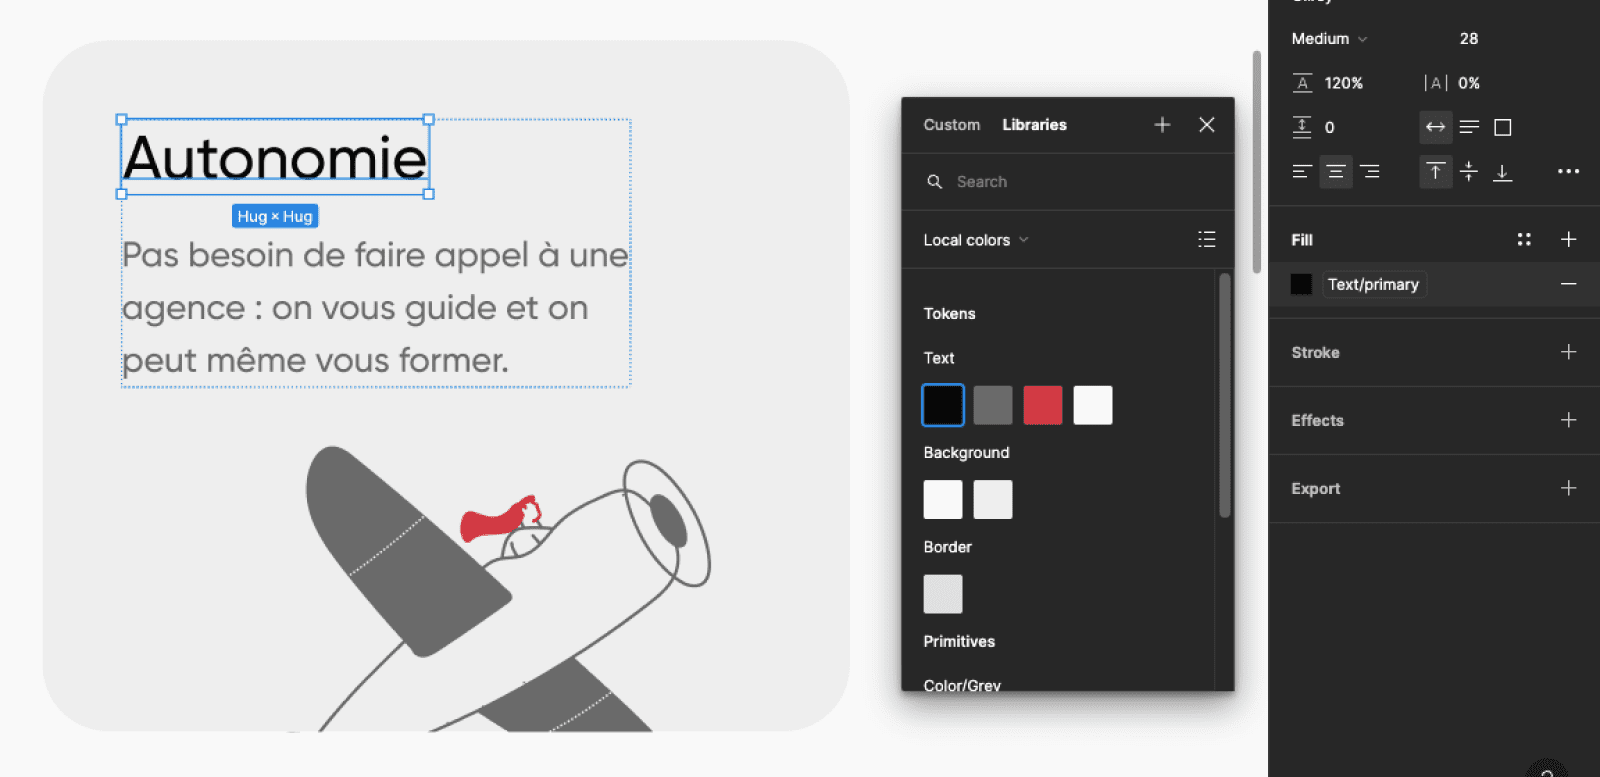
Everything is ready in the collections! Now you need to connect these variables to your Figma design. To do this, you must:
- Select a component from your prototype
- Access the variables by opening the color panel of the component and clicking on "Libraries" if it is not set by default.
- Assign the color variables from the "Tokens" collection to each component of the prototype
5. Switch from Dark to Light Mode
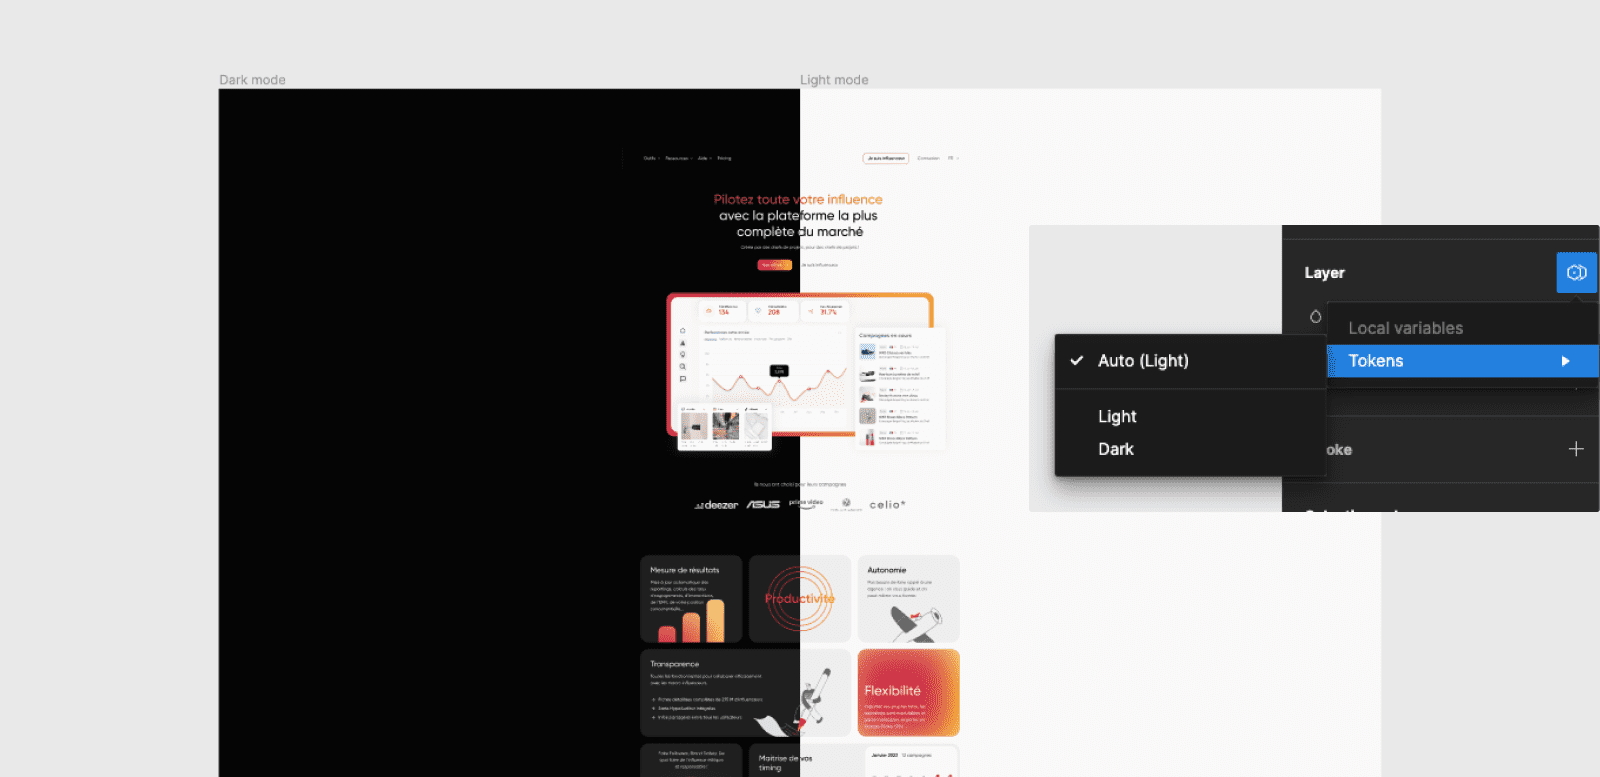
Your Dark & Light mode in Figma is ready! You just need to:
- Go to the layers features in the design panel
- Click on the "Variable" icon
- Open the "Tokens" collection
- Select one of the two modes, either Dark or Light mode
Another option is to leave the layer in auto mode. In this case, the design will automatically take the mode of the frame it is integrated into. You can create two distinct frames, set one frame to Light and the other to Dark, and switch the design from one frame to the other to adapt.
With the power of variables in Figma, you can now create prototypes in Dark & Light Mode more efficiently than ever. By following the steps outlined in this article, you can enhance the user experience by offering a color choice that suits everyone's preferences. Take advantage of this new feature to push the boundaries of web design and create visually captivating designs!
.webp)

.jpg)

.jpg)
