There are many different elements in Webflow to visually build web pages. Among them is the "Rich Text" element. Rich Text allows you to create "long" content on a page. This element is typically used for the content of a blog article, legal notices, biographies, and more.
The advantage of this element is that it allows you to add various elements inside it (headings, paragraphs, images, videos, links, etc.). Instead of using elements one by one, you can add a rich text to your page to create content.
The rich text element is very useful, especially for collections (blogs, teams, etc.) as it significantly reduces the number of fields required. However, rich text is not completely flexible. Customization options are quite limited, and not all existing Webflow elements (buttons, forms, sliders, etc.) can be used within it.
Nevertheless, Finsweet, with its custom attribute solutions, offers us the ability to add components (used on our site) into rich text to create a "powerful" rich text. Today, we will show you how to add custom components to your rich text.
In this tutorial, we will insert an image gallery into a rich text element.
For those interested, here is the official Finsweet documentation for Powerful Rich Text.
Step 1: Add a Script to Your Page
On the page containing the rich text where we want to add our component, you need to add the following code to the <!-- fs-richtext-ignore --><head> tag of your page. You can find this field in your page settings.

Step 2: Manipulations on Rich Text
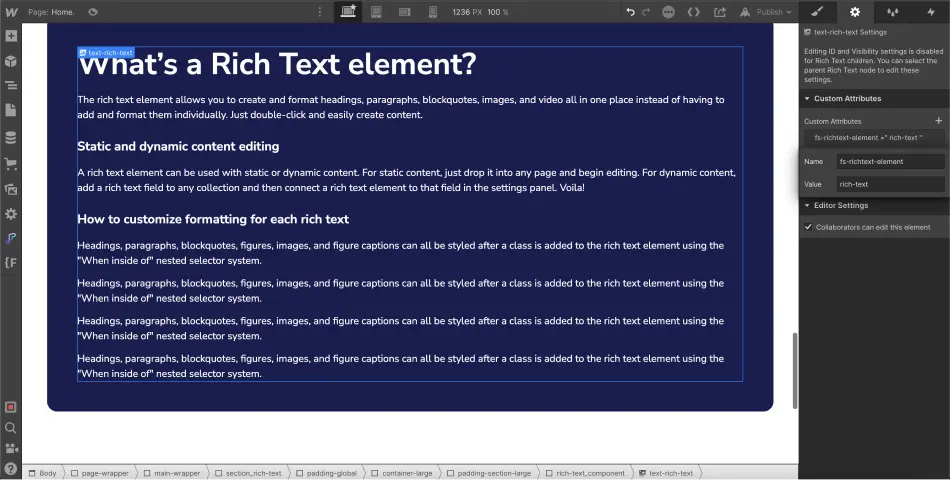
1. Add a Rich Text Element
If you haven't done so already, you'll need to add a rich text element to your page.
2. Custom Attribute on the Rich Text
Next, you’ll need to select your rich text element and assign it a custom attribute. To do this, click on the "settings" tab of the element and navigate to "Custom Attributes".
You will need to add the following attribute:
Name: fs-richtext-element
Value: rich-text
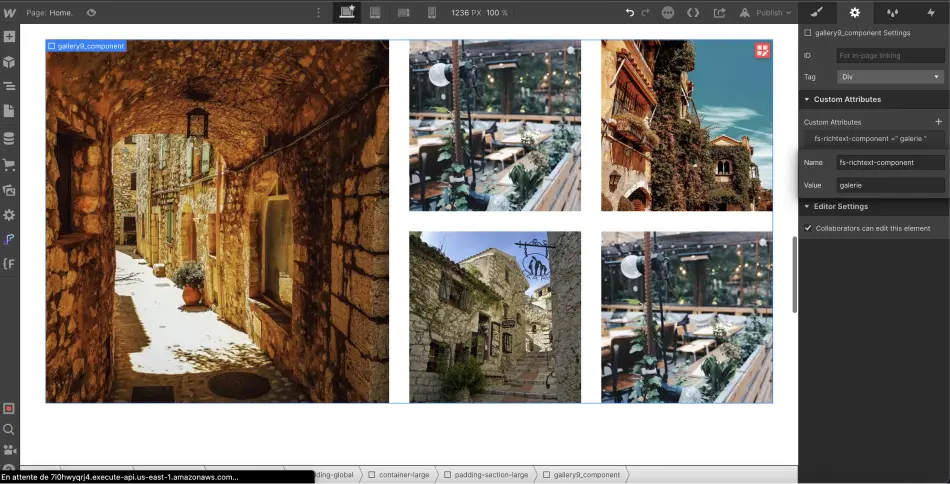
Step 3: Manipulations on the Component to Insert
After performing these steps on the rich text, you can select the component (it should be a div block) that you wish to insert into your rich text. In our case, we are selecting our gallery component. We will also add a custom attribute to it.
Name: fs-richtext-component
Value: custom-value
The value is defined by you. You can use any name you prefer. However, we recommend using a recognizable name for this value.
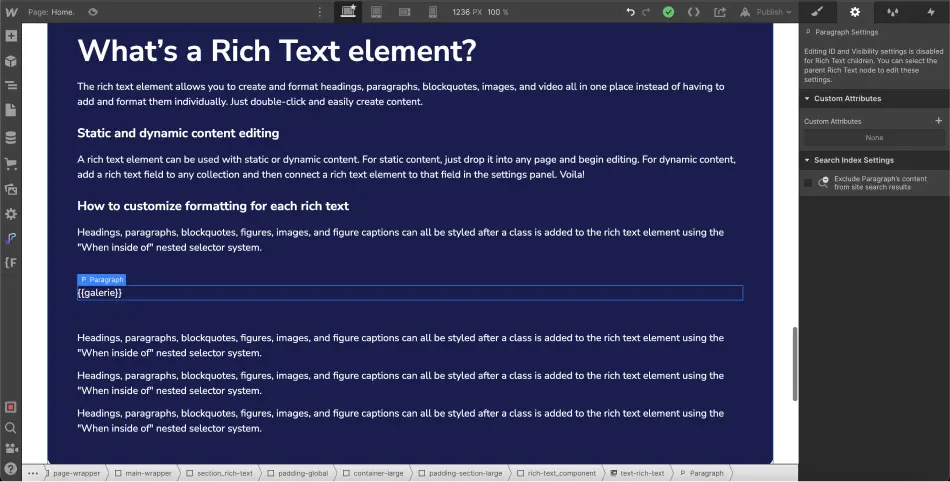
Step 4: Add the Component to the Rich Text
You will now return to your rich text element.
You need to add a new line (wherever you wish to insert your component) and add the following text:
{{custom-value}}.
The custom-value part must be replaced with the value you assigned to your component.
In our case, we will add {{gallery}}.
Step 5: Publish Your Project
In the Webflow Designer, you won’t see your component appear immediately; you will need to publish your project to see it.

BONUS: Retrieve a Component from Another Page
It is also possible to retrieve components that are on other pages besides the one where the rich text is located. To do this, the steps remain the same, but in your rich text, instead of {{custom-value}}, you will need to add {{custom-value="page-url"}}.
For example, if my component is located on the blog page, I would add {{custom-value="/blog"}} or {{custom-value="https://www.url.com/blog"}}.
And that's it for this tutorial, which will allow you to customize your rich text. To become an expert on Webflow, you can join our training or continue following our tutorials on the platform.
.webp)

.jpg)