Today, we will see how to add control buttons to switch from one tab to another using a bit of code.
The goal will be to create a button that moves to the first Tab to the left of the active Tab, and another that goes to the first Tab to the right of the active Tab.
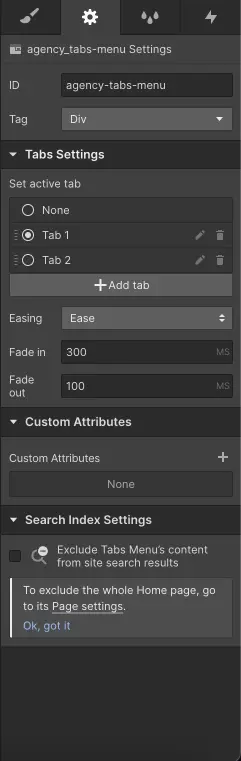
Step 1: Define a default active tab
After creating your Tab, the first action to take is to ensure that you have a default active Tab. It is essential that when your page loads, a tab is active.
To do this, you can go to the settings of your Tab and select the default active tab in "Set Active Tab."
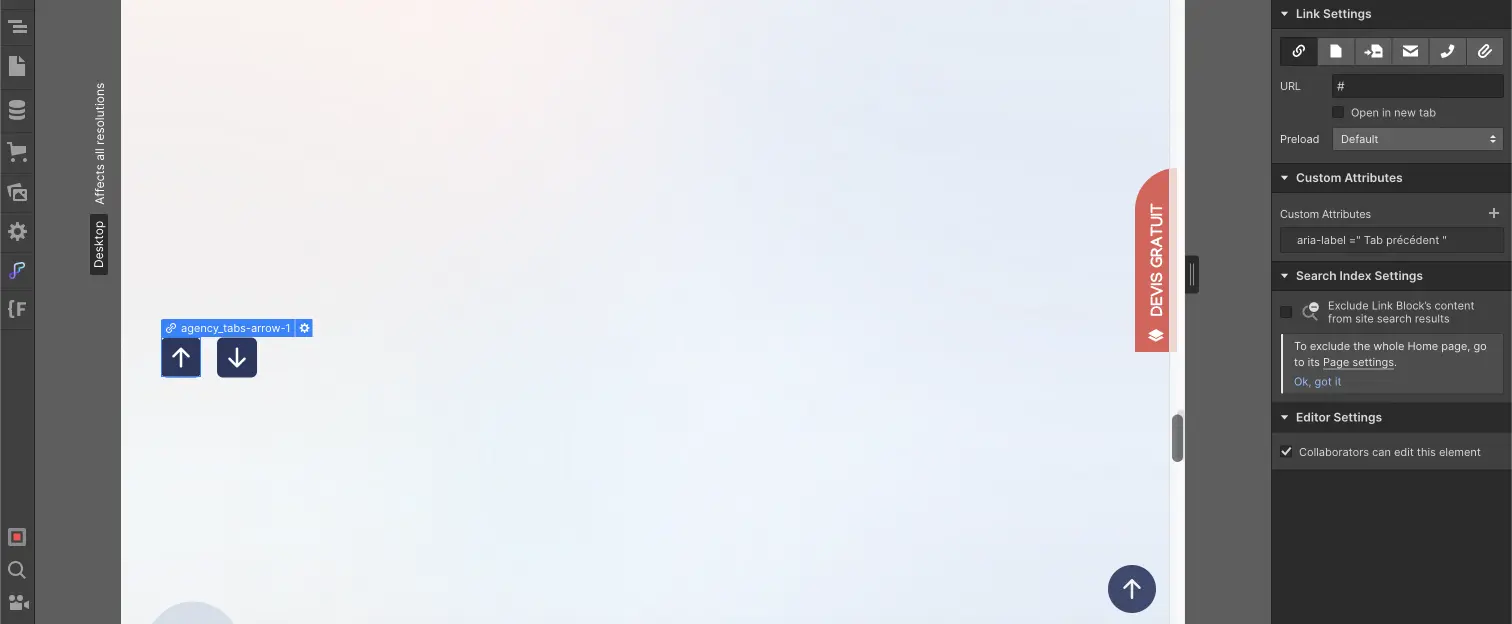
Step 2: Create 2 buttons
Now, we can start creating 2 buttons in our project. You can insert buttons, link blocks, or even a Div block if you prefer. However, we recommend adding a custom attribute of type aria-label to describe the purpose of the buttons.
You can customize the buttons as you like.
Step 3: Assign classes to the buttons
Once your buttons are created, you will need to assign them a class. Each button should have a specific class. For this, you can add a combo class.
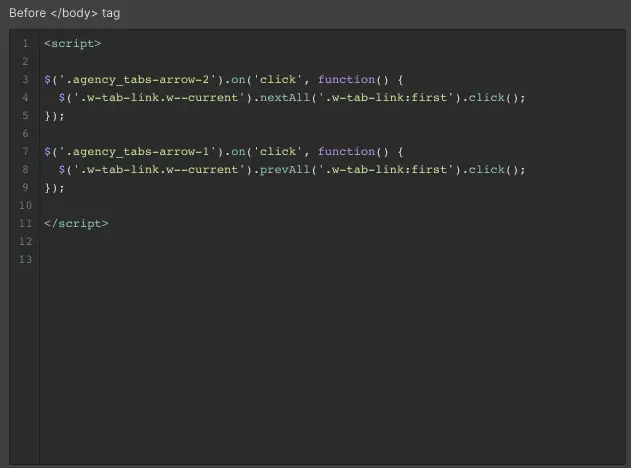
Step 4: Add jQuery code
Now we enter the slightly more technical part. We will insert the following code into the settings of our page, in the Before Body Tag field:
Now we need to modify this code a little.
Instead of classe-bouton-suivant, you will put the name of the class of the button that will allow you to move to the next Tab. If you used a combo class, you should change .classe-bouton-suivant to .class.combo-class where class is the first class of your combined class and combo-class is your combined class.
Instead of classe-bouton-precedent, you will put the name of the class of the button that will allow you to move to the previous Tab. If you used a combo class, you should change .classe-bouton-precedent to .class.combo-class where class is the first class of your combined class and combo-class is your combined class.
If you are using multiple Tabs on your page, you will need to add the class you assigned to your Tab link before the 4 .w-tab-link. For example, .home-header_tab-link.w-tab-link.
Step 5: Publish the Webflow project
The code only works when the project is live. Therefore, you will need to publish your project to test this functionality for changing Tabs with buttons!

If you wish, you can also check out our tutorial on creating buttons that allow horizontal scrolling.
.webp)


.jpg)