Tooltips are an effective way to enhance the user experience (UX) of your website by providing contextual information without cluttering the user interface (UI).
In this article, we will show you how to easily add tooltips to your Webflow projects using tippy.js, a lightweight and powerful JavaScript library.
What is tippy.js?
tippy.js is a lightweight JavaScript library that allows you to create customizable tooltips. Built on Popper.js, it offers optimal performance and great flexibility. With tippy.js, you can easily add tooltips to your HTML elements and customize them according to your needs.
Why use tippy.js with Webflow?
In Webflow, there is no native way to create "true" tooltips. It is possible to create them from scratch, but it requires animation work.
However, to add tooltips within the tool, tippy.js is an excellent choice for several reasons:
- Easy integration: tippy.js is straightforward to integrate.
- Customization: You can customize the tooltips to maintain design consistency with your site.
- Performance: Lightweight and fast, tippy.js will not affect the loading speed of your pages.
- Flexibility: Compatible with various types of content and interactions.
Step-by-step: Adding tippy.js to your Webflow project
Follow these simple steps to integrate tippy.js into your Webflow project and start adding tooltips.
1. Include tippy.js in your Webflow project
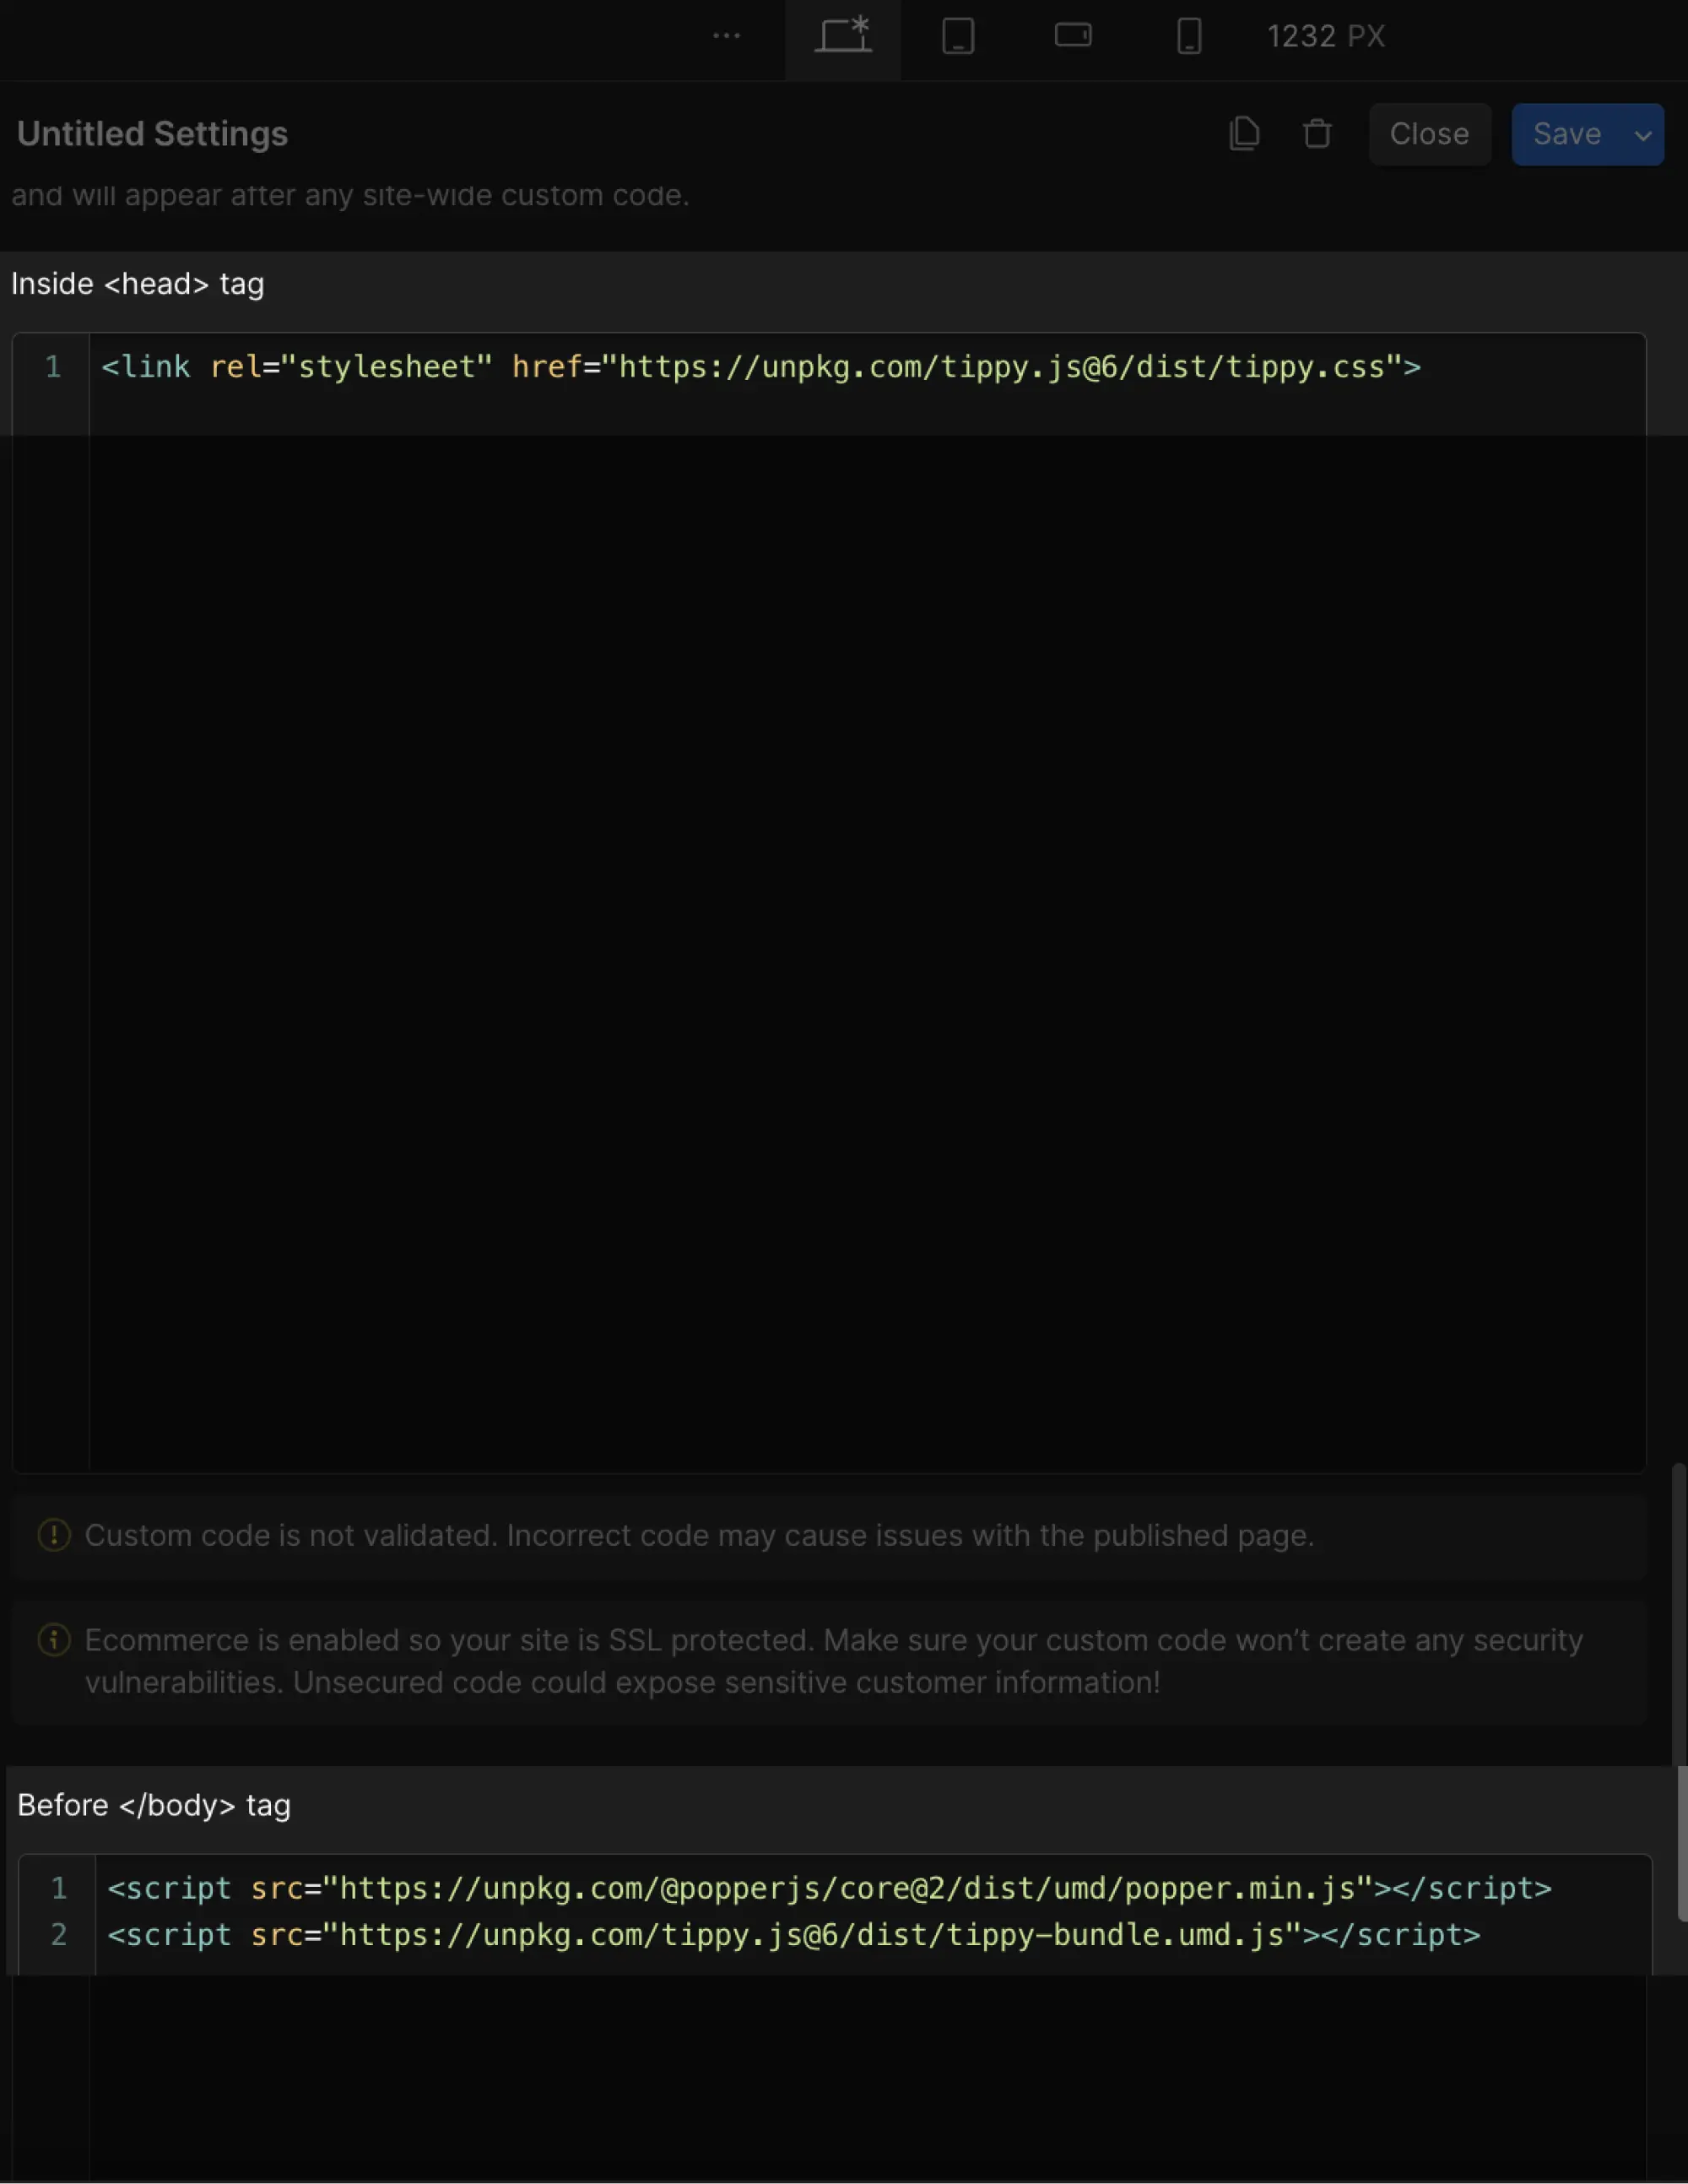
First, you need to include the CSS and JavaScript files for tippy.js in your project. To do this, go to the page settings and scroll down to the Custom Code tab.
Add the CSS link and the JavaScript scripts in the Head Code and Footer Code sections, respectively:
2. Add tooltips to your elements
Now that tippy.js is included in your project, you can start adding tooltips to your HTML elements. For this, we will add the custom attribute data-tippy-content in the element settings.
For example, to add a tooltip to a button, follow these steps:
- Add a button to your page
- Select the button and go to its Settings.
- Scroll down to the custom attributes section
- Add a new attribute with data-tippy-content as the name and the tooltip text as the value.
![Screenshot of a button in Webflow with the attribute [data-tippy-content="I am the text"]](https://cdn.prod.website-files.com/67053868fc01e494462e71c9/6710cdd8996985033ec5c2af_666018a6656207cdbf9f0474_attribute-data-tippy-content-webflow.webp)
Here is an example of a button with a tooltip; it has name: data-tippy-content and value: Free Live Webflow Training Every Thursday
3. Initialize tippy.js
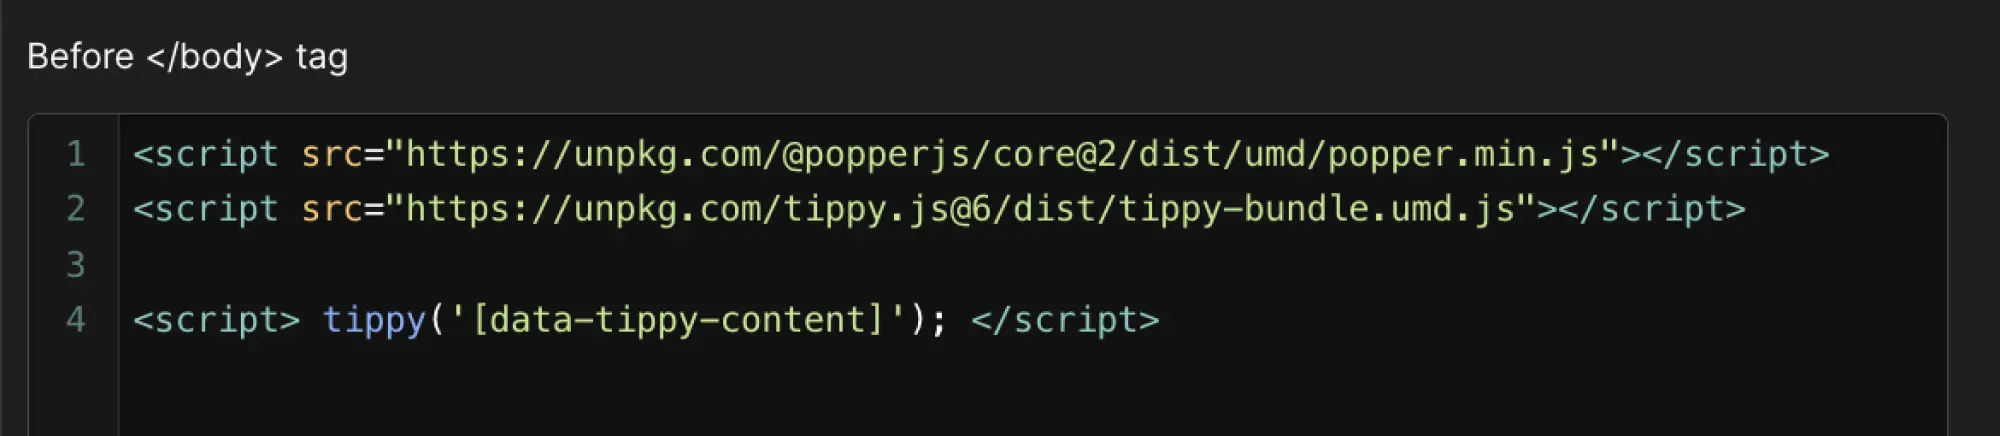
To make the tooltips appear, you need to initialize tippy.js.
To do this, add the initialization script in the custom code (before body Tag) section of your Webflow page.
4. Customize your tooltips
tippy.js offers a variety of customization options. You can configure the animation, theme, display delays, and much more.
Check out the tippy.js documentation to add advanced features to your tooltip and to match your design.
For example, here is a more customized button example below.
Here are the custom attributes of this button:
- data-tippy-followCursor="horizontal"
- data-tippy-theme="digidop"
- data-tippy-duration="300"
Here is the CSS code to create the "digidop" theme:
Conclusion
By following these simple steps, you can easily add stylish and customized tooltips to your Webflow projects using tippy.js. Not only does this enhance the user experience, but it also adds a professional touch to your site.
Feel free to further explore the options in tippy.js to make the most of this powerful library.
Discover other useful JavaScript libraries:
.webp)


.webp)