Airtable is the new no-code spreadsheet 2.0. This database, which has gained significant attention in recent months, allows a company to manage a multitude of tasks from a single tool. This is primarily due to its various “views,” which enable businesses to switch from a simple grid display to a calendar view, Kanban, Gantt, gallery, or even a contact form.
Many other features, such as automation, filtering, linking between spreadsheets, processing different types of data, etc., have made this tool popular.
In this article, we present several methods to connect Airtable to Webflow. Numerous tools exist to connect your Airtable data to Webflow, including using a no-code automation tool such as Make (formerly Integromat) or Zapier, directly embedding Airtable into your site, or even using an Airtable extension like Nobull.
We will explore the advantages and disadvantages of all these methods in this article.
Connect Webflow and Airtable with Integromat

1. Actions Possible by Automating Webflow and Airtable with Integromat
You have two options when you connect Airtable and Webflow with Integromat:
Send Data from Webflow to Airtable
Send data from a Webflow form for a new contact, newsletter subscription, event registration, new job candidate, etc.
Send Data from Airtable to Webflow
This type of connection will be particularly useful for creating, deleting, or updating items in the Webflow CMS. For example, it can be beneficial for managing your e-commerce articles, inventory, running a blog from Airtable, creating collections, etc.
2. Advantages of Integromat for Connecting Webflow and Airtable
Simple Connection with Integromat Modules
Integromat is our favorite no-code automation tool at Digidop. It allows for easy integration of many no-code or low-code tools by creating chains of automated actions. Integromat includes Webflow and Airtable modules, greatly simplifying the process of connecting them.
Numerous Action Options
Integromat offers a wide variety of actions for each of the two modules:
Webflow Module
- Webhook: for instant receipt of data from actions performed on the site.
- Site: to publish a site or receive specific information.
- Collection: for data related to collections.
- Item: to obtain, create, update, or delete articles.
- Order: for tracking e-commerce orders.
- Inventory: for tracking e-commerce inventory.
- API Call: to trigger APIs.
Airtable Module
- Watch a Record: to analyze spreadsheet rows based on their creation or modification dates.
- Watch Responses: to trigger automation following a data submission.
- Records: to search, create, modify, or delete data rows.
- API Call: to trigger APIs.
Custom Automations
Integromat allows you to customize your Webflow and Airtable automations according to your needs. Add as many modules as you want by connecting Webflow and Airtable to your other tools. SaaS tools, no-code tools, connect your Webflow site and Airtable databases to the rest of your business using Integromat.
3. Disadvantages of Integromat for Linking Webflow to Airtable
Knowledge of No-Code Automation
Integromat is a more complex automation tool to get started with than Zapier. Although it offers more action possibilities, if you are not familiar with using such no-code tools, you might encounter difficulties. Fortunately, you have the excellent Digidop blog to help you automate your Webflow site with Integromat.
An Additional Tool
An additional tool to add to your stack, whereas an embed could have allowed you to bypass needing it.
Connect Webflow and Airtable with an Embed
1. Possible Actions with an Airtable Embed in Webflow
Just like with Integromat, an Airtable embed in Webflow will allow you to either receive data or send it.
Send Data from Webflow to Airtable
An Airtable form embed will automatically receive data in the relevant database.
Send Data from Airtable to Webflow
Data from Airtable will display automatically and in real-time thanks to the embed function. You can easily share the progress of your projects, new events, etc.
2. Advantages of an Airtable Embed in Webflow
An Alternative to Integromat
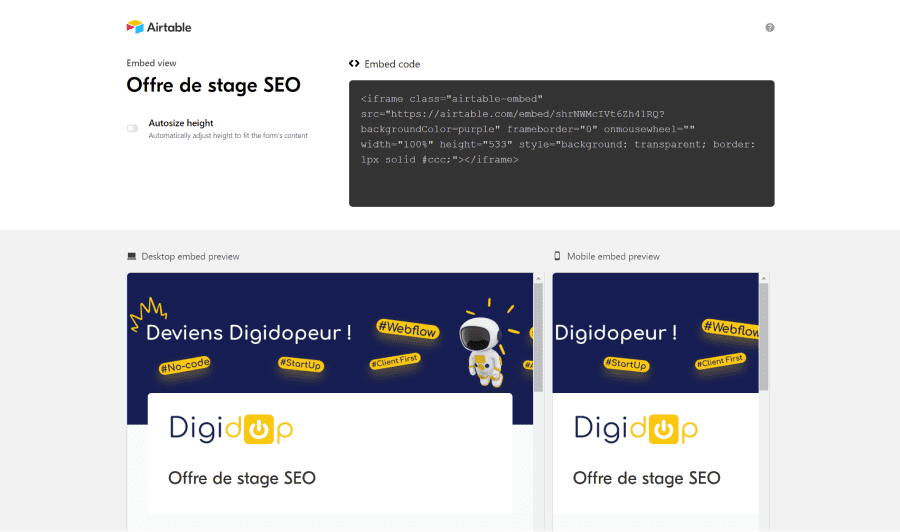
If you don’t have automation tools like Integromat or Zapier, you can easily link Webflow and Airtable using an embed. An embed is a code snippet that you can directly retrieve from an Airtable base and then integrate into your Webflow site.
Easy Integration
Integrating an Airtable embed into Webflow only takes a few clicks. You simply need to choose whether you want to allow filtering of the sheet from your site: a simple box to check in Airtable.
Instant Data
The advantage of an embed is that it allows direct interaction with your Airtable database from Webflow. Information is thus instantly updated on your site.
Airtable offers embeds for all its views. You can easily integrate schedules, forms, events, or gallery view profiles into your site, etc.
3. Disadvantages of an Airtable Embed in Webflow
Customization and Design
The first issue lies in customization and design. The Airtable design is very clean and integrates easily into most sites, but it is not possible to customize the interface as much as you could with Webflow.
Disjointed from the Rest of the Website
Another limitation of the embed is that it is disassociated from the other elements of the site. You will not be able to set actions following interactions with the embed. More concretely, clicking on a card in a gallery view will not redirect you to a dedicated webpage for that card, something you could set up with Webflow. Nothing too complicated; everything is possible with Webflow. 😁
A Hindrance to Your SEO Performance
Although an embed is a relatively small piece of code, it adds extra loading time to your page. The loading time of a web page is directly correlated with the user experience for search engines. The longer this time is, the worse your page’s SEO score will be.
Beyond loading time, your SEO content strategy takes a hit. Text, image elements, etc., are not perceived as well by search engines compared to if they had been written directly on your site.
Webflow offers advanced markup systems for the elements of your website, and it will not be possible to configure them on an Airtable embed. Therefore, if you wish to use this method, we recommend doing so with non-strategic elements for your organic SEO.
3 - Connect Webflow and Airtable with Nobull
1. Possible Actions Between Webflow, Airtable, and Nobull
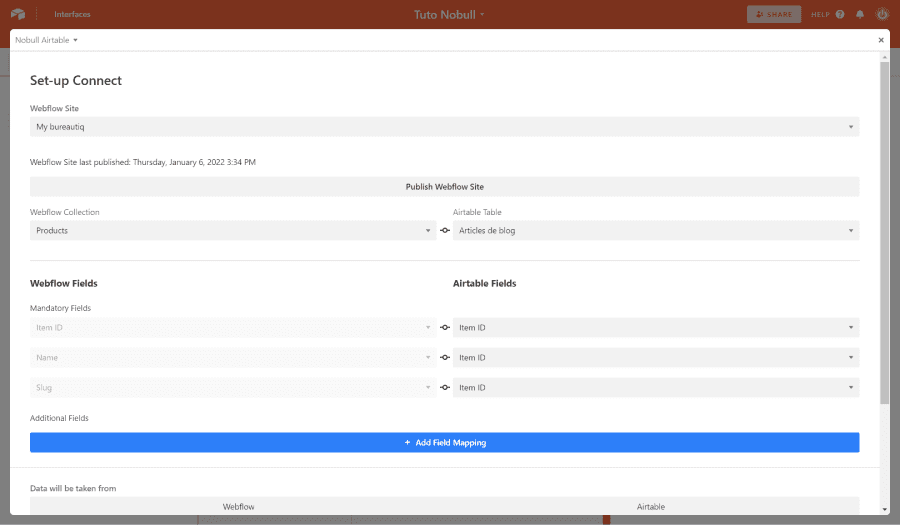
Nobull allows you to match your Webflow CMS fields with the fields of your Airtable table. By connecting Webflow and Airtable with Nobull, you can transfer data in both directions.
Send Data from Webflow to Airtable
Nobull enables you to choose the Webflow CMS as the primary source to send data to Airtable. Thus, you can transfer all items from a CMS collection to an Airtable table with a single click.
Send Data from Airtable to Webflow
The reverse is also possible: send data from an Airtable table to create new items in one of your Webflow collections.
Update Data
Nobull will also account for all modifications made either from the Webflow CMS or the Airtable table to update them. Thus, you will have perfect consistency between Airtable and your website.
2. Advantages of Nobull for Linking Webflow and Airtable
A Simple Connection from Airtable
No need to go through a third-party platform; Nobull is directly integrated into the Airtable applications. You can think of it as a Webflow extension within Airtable.
A Free No-Code Tool
Nobull is 100% free, so take advantage of it!
Simple Settings
Nobull guides you step-by-step through the setup with your Webflow site. The no-code tool is divided into two parts: on your left, all the fields corresponding to Webflow, and on your right, all those corresponding to Airtable. You can easily match the different fields.
3. Disadvantages of Nobull for Linking Webflow to Airtable
Works Only When Airtable is Open
This is the main drawback compared to Zapier, Integromat, or an embed. Here, the automations between your CMS and Airtable will only work when the Airtable application is open in your browser. It isn't comparable to a native Airtable automation, which triggers continuously.
Limited Trigger Options
You have three types of triggers available:
- Manual
- Hourly
- Daily
More Complex to Connect Other Tools
If you want to create extensive automation chains, it will be more complex. First, because the trigger works only when Airtable is open, and secondly, because Nobull is exclusively developed for Airtable. Therefore, you will need to pass through an additional Airtable automation or no-code automation tools to go further in your workflows.
4. New: CMS Bridge for Airtable & Webflow
Released in 2024, this new tool from Finsweet replaces Nobel and allows for seamless connection between Airtable and Webflow.
- CMS automation with the Airtable database
- Data migration

 Preview Newsletter